If you’ve tried to launch Valorant recently and were greeted by a frustrating "VAN" error code or a message about "Hypervisor-Protected Code Integrity," you aren't alone. As Riot Games ramps up its security measures in 2026, the technical barrier between your hardware and the game has become much thinner. Whether you’re trying to satisfy Vanguard’s strict requirements or looking to tweak your system for maximum frames, understanding HVCI is no longer optional; it’s a necessity for any competitive climber.

- ✅ Reduce Lag and High Ping.
✅ Boost FPS at the Same Time.
✅ Support 2000+ Online Games
✅ Change Server Without Latency.
✅ Multiplatform: PC, Console, Mobile.
✅ End Connection & Crashing Issue
✅ Get Valorant Easier Server
Part 1: What Is HVCI for Valorant?
Part 2: How To Enable and Disable HVCI Valorant?
Part 3: How to Ensure the Best Valorant Gaming Experience?
Part 1: What Is HVCI for Valorant?
HVCI, or Hypervisor-Protected Code Integrity, is a Windows security feature that uses hardware virtualization to prevent unauthorized code from running in the operating system kernel. In simple terms, it helps protect your system from low-level malware and ensures only verified drivers and programs can execute. Valorant relies on a secure environment to maintain fair gameplay, which is why enabling HVCI is sometimes required for proper operation.
Key features of HVCI for Valorant:
- Protects system memory from malicious code injection
- Strengthens kernel-level security enforcement
- Works alongside virtualization-based security
- Prevents unsigned drivers from loading
- Supports Riot Vanguard anti-cheat compatibility
- Enhances overall system integrity during gameplay
Understanding this security layer helps explain why many players look up how to enable HVCI for Valorant when troubleshooting launch errors
Part 2: How To Enable and Disable HVCI Valorant?
Configuring HVCI depends on your Windows version. Below are detailed methods for enabling HVCI on Windows 10 and Windows 11, and for disabling HVCI if needed for troubleshooting or compatibility reasons.
How To Enable HVCI Valorant in Windows 10
If you’re using Windows 10, enabling HVCI requires turning on Memory Integrity through Windows Security.
Follow these steps carefully:
Step 1. Press Windows + I to open Settings.
Step 2. Navigate to Update & Security.
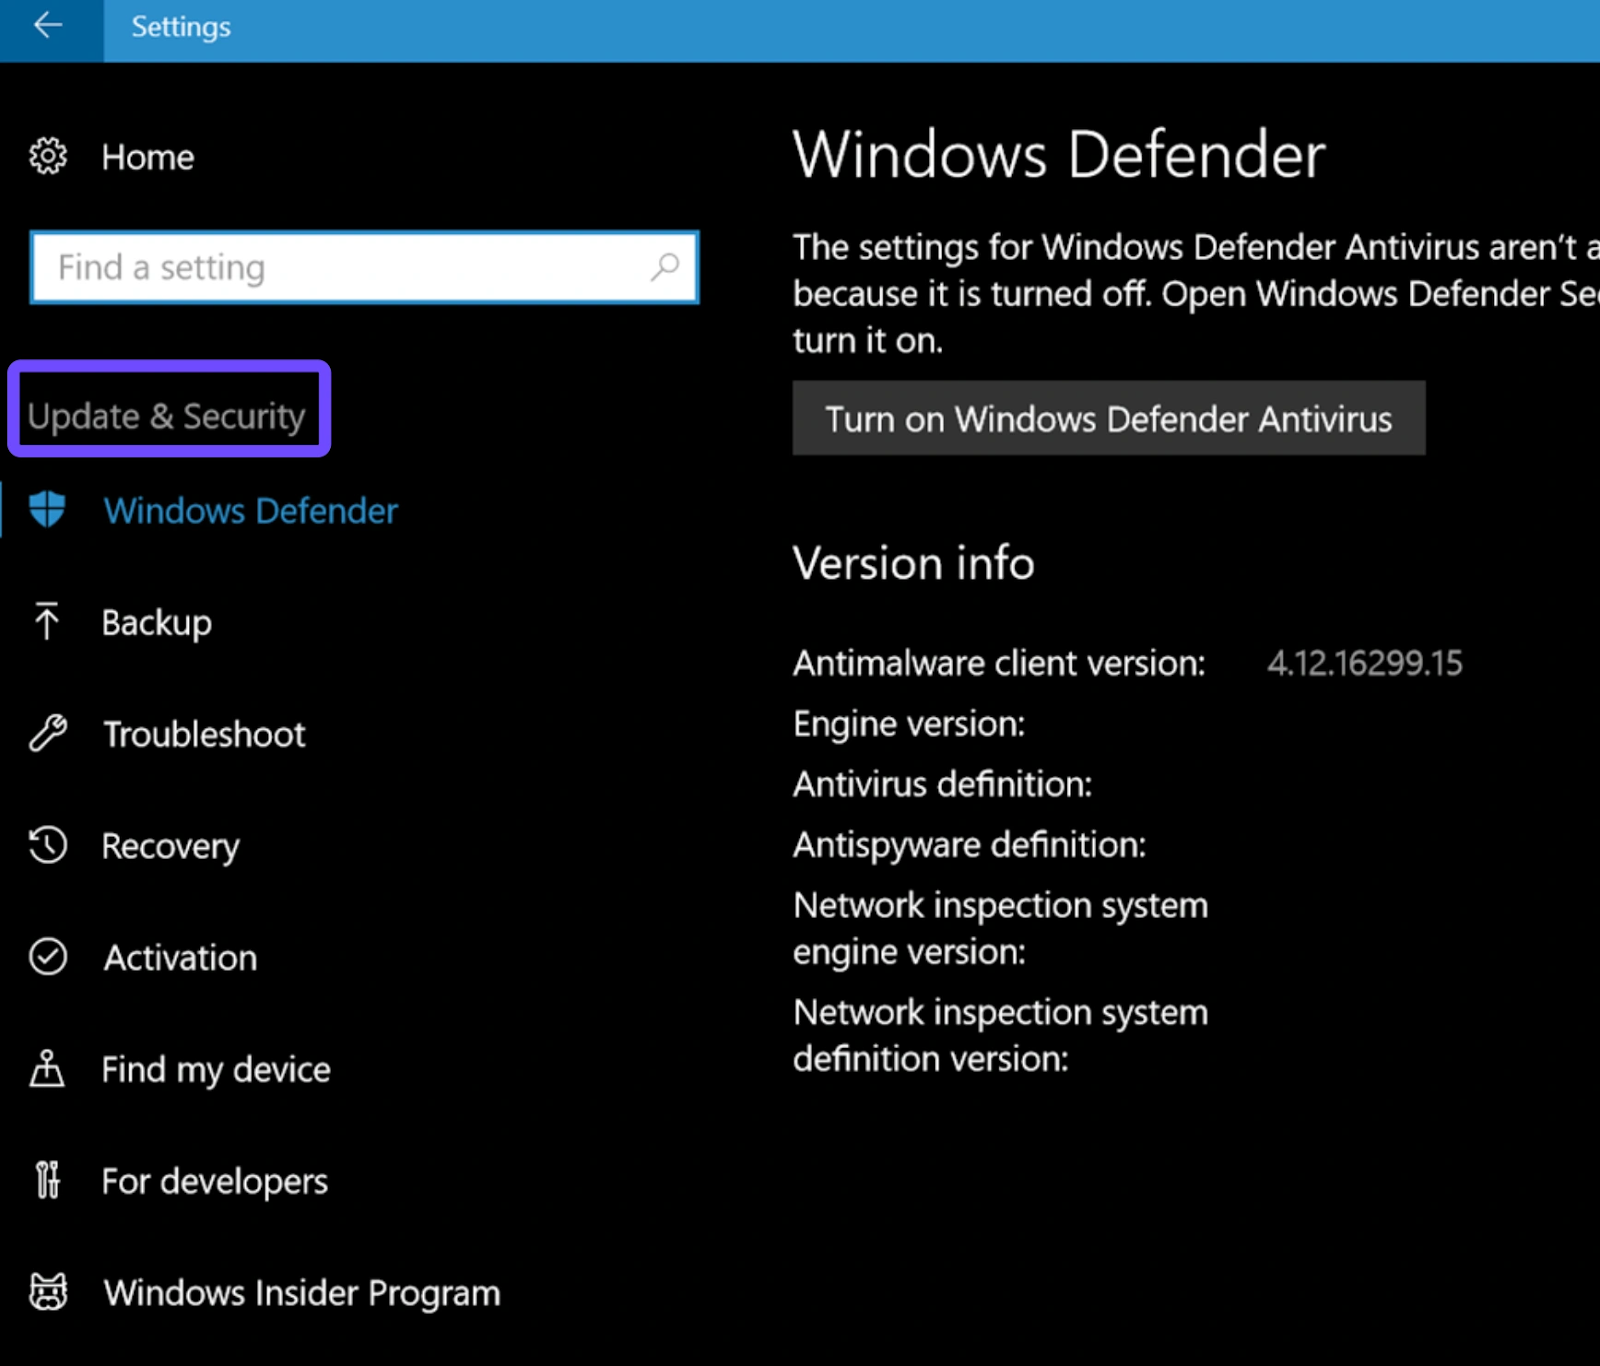
Step 3. Click Windows Security in the left sidebar.
Step 4. Select Device Security.
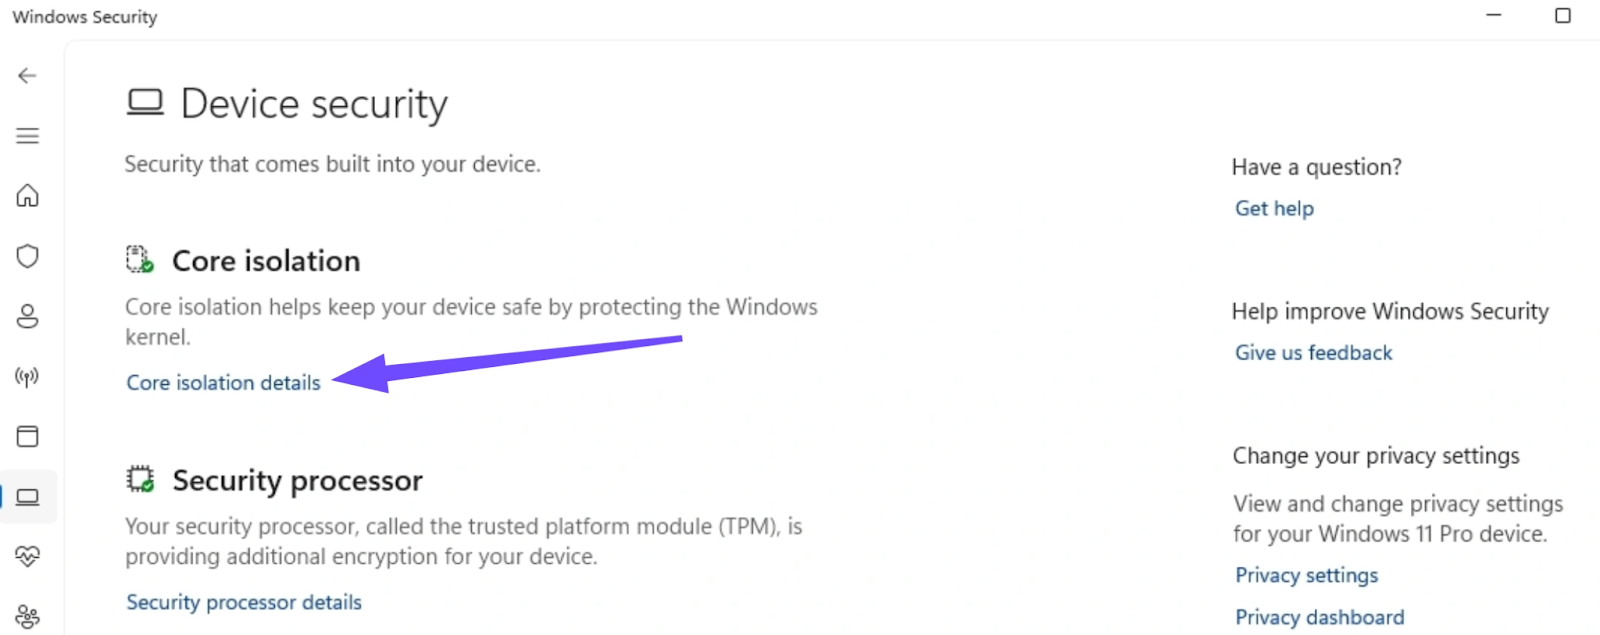
Step 5. Under Core Isolation, click Core isolation details.
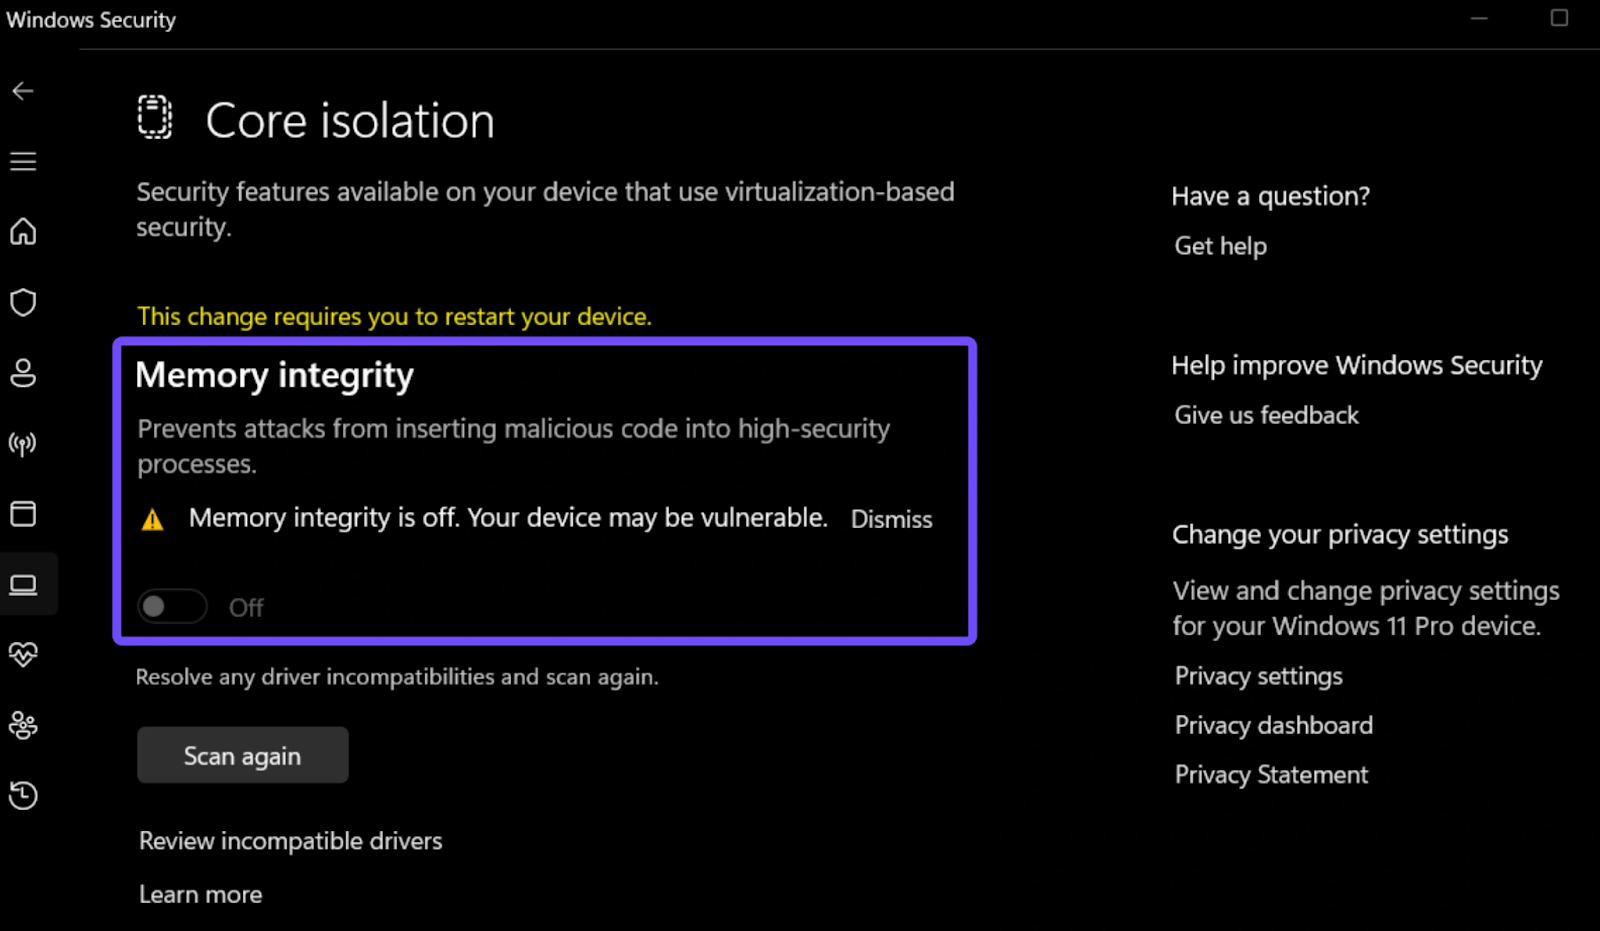
Step 6. Toggle Memory Integrity to ON.

Step 7. Restart your computer to apply changes.
After rebooting, launch Valorant to verify that the security requirement is satisfied. If you previously searched for hvci enable valorant solutions, this is typically the method recommended by system security prompts.
If Memory Integrity cannot be enabled, it usually means an incompatible driver is installed. Updating or removing conflicting drivers often resolves the issue.
How To Enable HVCI Valorant in Windows 11
Windows 11 integrates security features more tightly, but the process remains straightforward. Here’s how to enable HVCI Valorant Windows 11:
Open Settings from the Start menu.
Step 1. Go to Privacy & Security.
Step 2. Select Windows Security.
Step 3. Click Device Security.
Step 4. Under Core Isolation, open Core isolation details.
Step 5. Turn on Memory Integrity.
Step 6. Restart your system.
Once your system reboots, Valorant should recognize the secure environment automatically. Many players searching for how to enable HVCI Valorant Windows 11 discover that this setting resolves Vanguard security warnings instantly.
If the toggle is unavailable, ensure virtualization is enabled in BIOS and that your system supports hardware virtualization.
How to Disable HVCI Valorant?
In some cases, users may need to disable HVCI due to performance concerns, compatibility issues, or troubleshooting steps recommended by support teams. While security is important, temporarily disabling HVCI can help identify whether it’s causing conflicts.
To disable HVCI Valorant:
Step 1. Open Settings.
Step 2. Navigate to Windows Security.
Step 3. Click Device Security.
Step 4. Select Core isolation details.
Step 5. Toggle Memory Integrity to OFF.
Step 6. Restart your computer.
Disabling HVCI reduces kernel-level protection, so it should only be done when necessary. If your system struggles with stability or driver compatibility, this method can help diagnose the issue before re-enabling security features.
Part 3: How to Ensure The Best Valorant Gaming Experience
Even after properly configuring HVCI, network instability can still impact gameplay. Lag spikes, packet loss, and high ping often create frustrating competitive disadvantages. This is where LagoFast helps maintain a smooth and responsive experience by optimizing your connection and stabilizing game traffic.
LagoFast works as a dedicated game booster designed to reduce latency and enhance connection reliability for Valorant players. Instead of relying solely on default routing, it intelligently selects optimized paths to game servers, helping maintain consistent performance during intense matches.
Key Features of LagoFast for Valorant:
- Real-Time Ping Reduction: Automatically switches to the fastest node to keep your latency at an absolute minimum.
- Packet Loss Fixer: Specialized protocols to prevent "teleporting" players and unregistered shots.
- FPS Boost Tool: Optimizes your CPU and GPU settings with one click, potentially recovering frames lost to Windows security background processes.
- Multipath Connection: Maintains stability by using multiple data paths simultaneously; if one route jitters, the other takes over instantly.
- Easy Lobby Access: Helps you find the best regional servers for a smoother competitive experience.
Tutorial to use LagoFast to optimize your Valorant gaming experience on PC:
Step 1: Click the Free Trial button to download and install LagoFast.
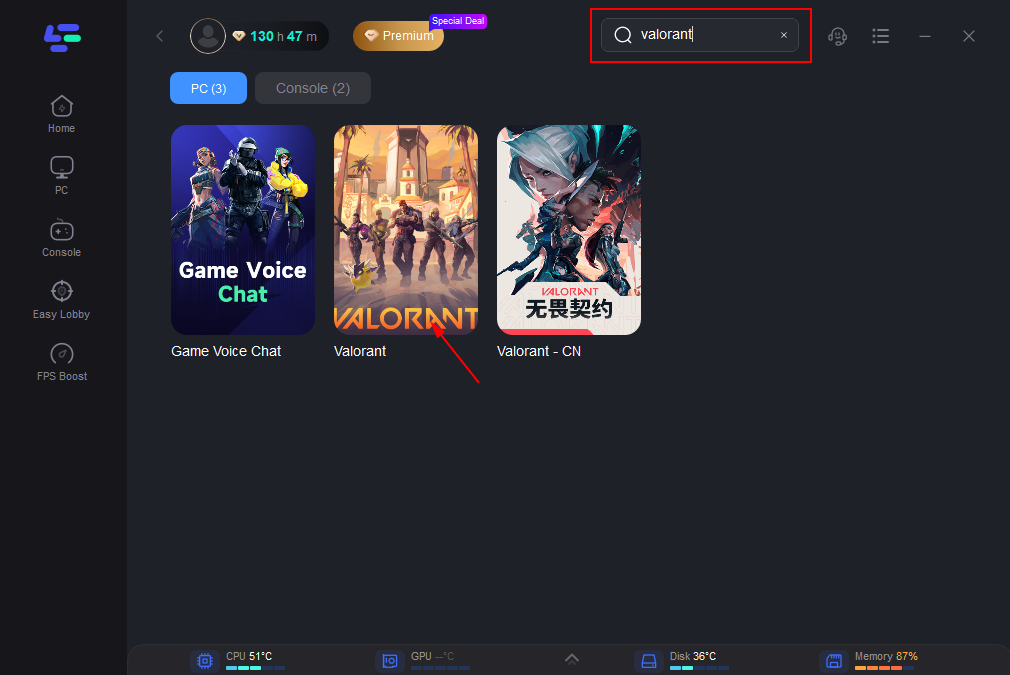
Step 2: Open LagoFast, then click the PC button on the left and search for Valorant in the search bar, and click it after it appears.
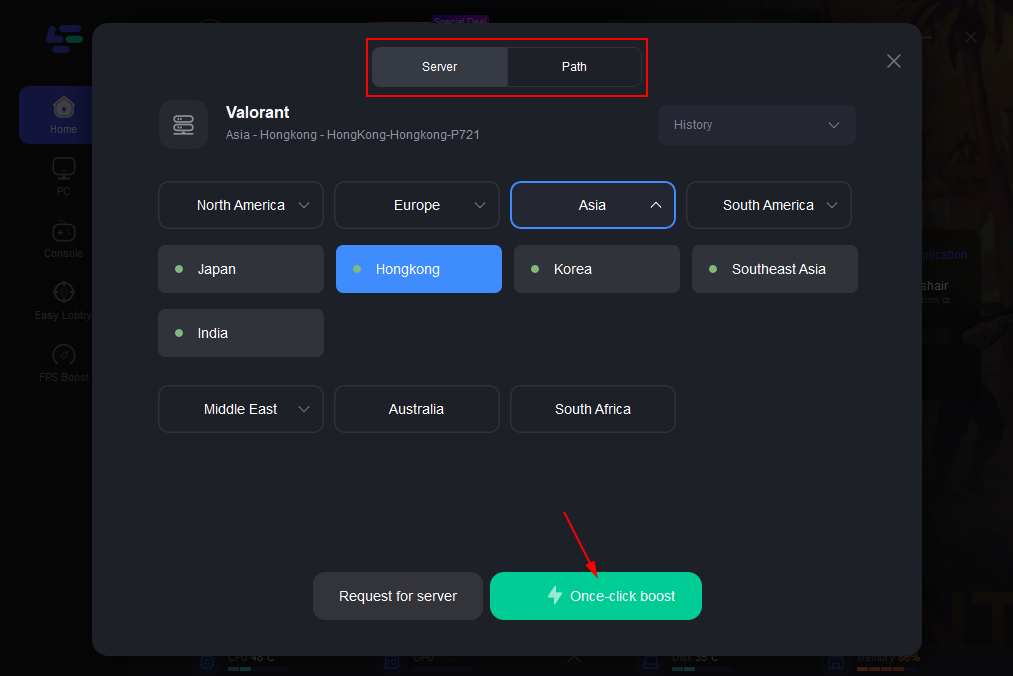
Step 3: Click on “Server” to change to a better server that optimizes the gaming experience, then click on “Smart Boost”.
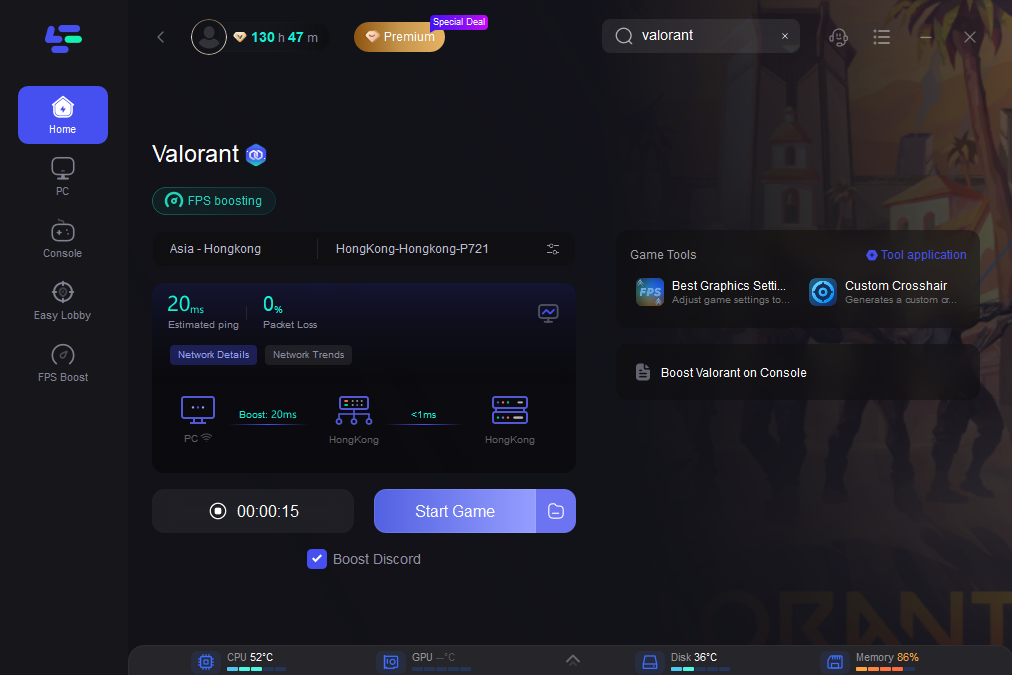
Step 4: Check the specific game ping, packet loss, and multiple path connections on the right side. Finally, click the “Start Game” to play the game.
Conclusion
Configuring Windows security correctly plays an essential role in ensuring Valorant runs without errors or compatibility warnings. Whether you need to learn how to enable HVCI Valorant Windows 10, how to enable HVCI Valorant Windows 11, or how to disable HVCI Valorant temporarily, understanding these system settings helps eliminate common launch issues. Pairing proper configuration with performance tools like LagoFast creates a more stable and enjoyable gaming environment. With security enabled and connectivity optimized, players can focus entirely on gameplay without unnecessary technical interruptions.

Boost Your Game with LagoFast for Epic Speed
Play harder, faster. LagoFast game booster eliminates stutter and lags on PC, mobile, or Mac—win every match!
Quickly Reduce Game Lag and Ping!
Boost FPS for Smoother Gameplay!