
Seeing the “VAN: RESTRICTION – HVCI enabled” error in Valorant can be confusing, especially when the game says your account does not meet the requirements to play. In most cases, this message is related to HVCI, also known as Memory Integrity, a Windows security feature required by Riot Vanguard on some systems.
This guide will show you how to fix the Valorant HVCI enabled error on Windows 10 and Windows 11, including how to enable Memory Integrity, check BIOS virtualization, fix incompatible drivers, reinstall Vanguard, and use LagoFast’s HVCI error fix feature to get back into Valorant more easily.
Quick option: If you want a faster way to handle the Valorant HVCI enabled error, LagoFast provides an HVCI error fix feature for Valorant players. You can use it to help repair the issue and then optimize your Valorant connection for lower ping, less lag, and a more stable server route.

- ✅ Reduce Lag and High Ping.
✅ Boost FPS at the Same Time.
✅ Support 8000+ Online Games
✅ Change Server Without Latency.
✅ Multiplatform: PC, Console, Mobile.
✅ End Connection & Crashing Issue
✅ Get Valorant Easier Server
Quick Checklist to Fix HVCI Enabled Error in Valorant
- Open Windows Security and turn on Memory Integrity.
- Restart your PC and launch Valorant again.
- If Memory Integrity is greyed out, check incompatible drivers.
- If Core isolation is missing, enable virtualization in BIOS/UEFI.
- Check TPM 2.0, Secure Boot, and UEFI mode.
- Update Windows, chipset drivers, GPU drivers, and peripheral software.
- Reinstall Riot Vanguard if the error remains.
- Use LagoFast’s HVCI fix feature to simplify the repair process.
What Does “VAN: RESTRICTION HVCI Enabled” Mean in Valorant?
The Valorant HVCI enabled error usually appears with a message like this:
VAN: RESTRICTION
Your account does not meet the following requirements in order to play:
HVCI enabled
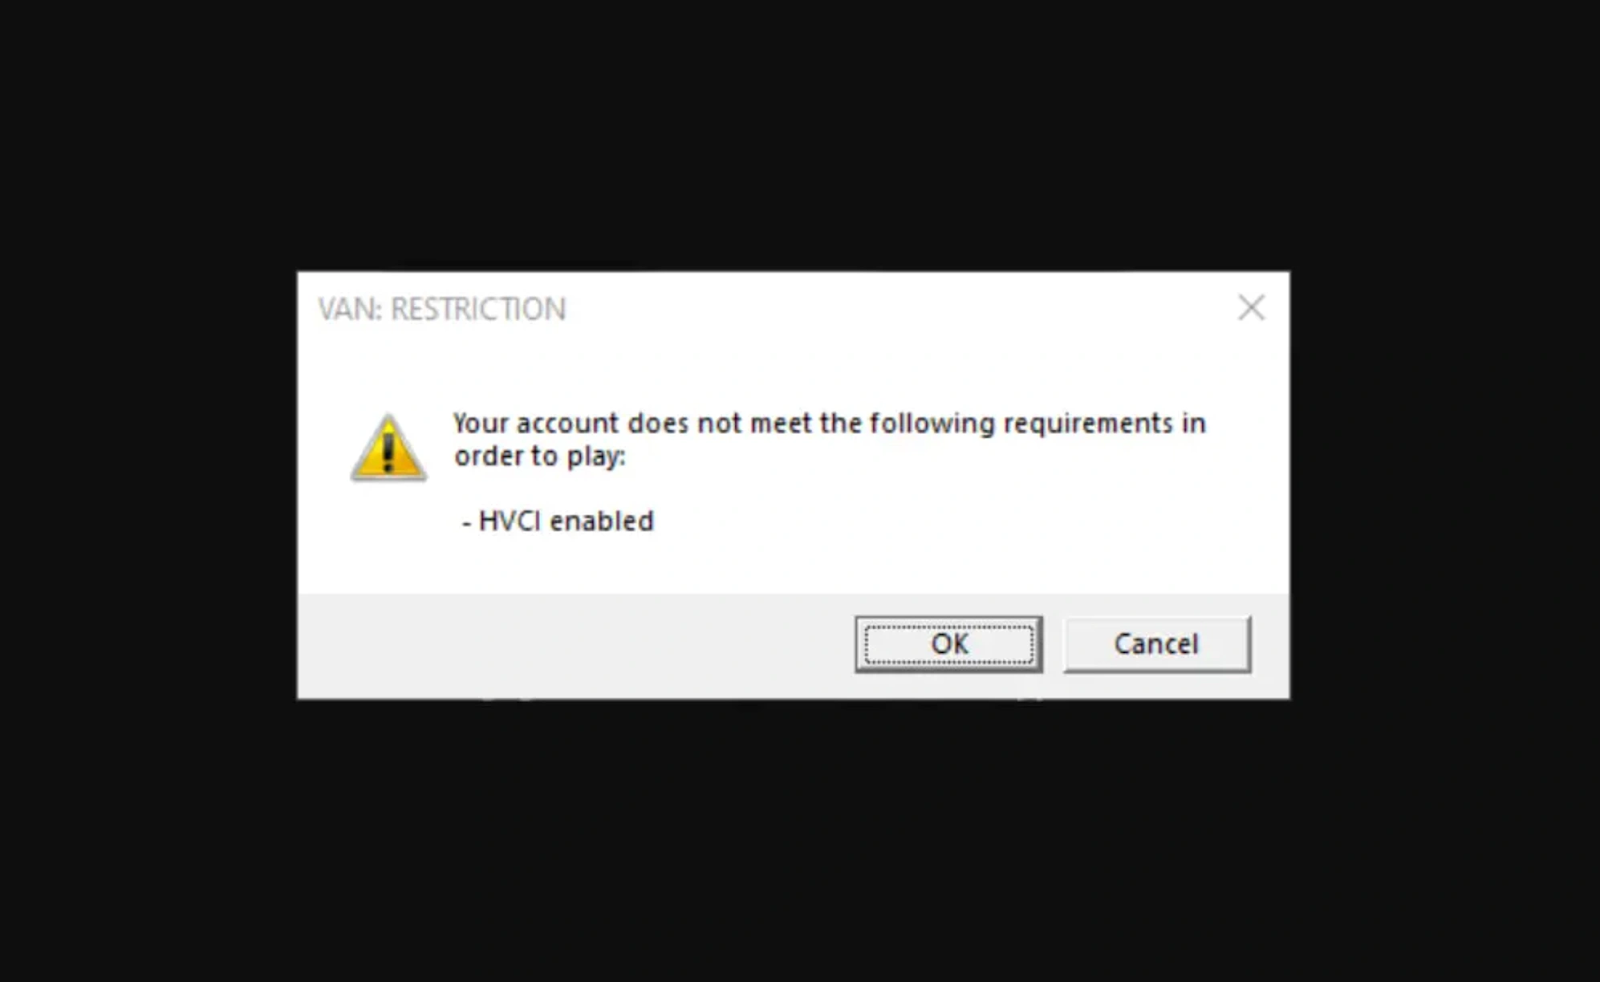
HVCI stands for Hypervisor-Protected Code Integrity. In Windows Security, it is commonly shown as Memory Integrity under Core isolation. Riot Vanguard may require this protection to be enabled and working correctly before Valorant can launch.
The error can happen for several reasons. Memory Integrity may be turned off, blocked by incompatible drivers, missing because virtualization is disabled in BIOS, or affected by TPM 2.0, Secure Boot, Windows updates, or Vanguard installation issues.
How to Enable HVCI for Valorant on Windows 10 and Windows 11
Many Valorant players search for how to enable HVCI, how to enable HVCI on Windows 10, and how to enable HVCI on Windows 11. The exact path is slightly different depending on your Windows version.
How to Enable HVCI for Valorant on Windows 11
- Press the Windows key.
- Search for Windows Security.
- Open Device Security.
- Under Core isolation, click Core isolation details.
- Turn on Memory Integrity.
- Restart your PC.
- Open Riot Client and launch Valorant again.
How to Enable HVCI for Valorant on Windows 10
- Open Settings.
- Go to Update & Security.
- Open Windows Security.
- Click Device Security.
- Under Core isolation, select Core isolation details.
- Turn on Memory Integrity.
- Restart your PC and test Valorant again.
If you cannot find Core isolation or Memory Integrity, continue with the BIOS/UEFI steps below.
8 Ways to Fix “HVCI Enabled” VAN Error in Valorant easily
Fix 1: Enable Memory Integrity in Windows Security
This should be the first fix for most players. Do not start by turning HVCI off. Valorant is usually asking you to enable it.
- Press the Windows key and search for Windows Security.
- Open Device Security.
- Under Core isolation, click Core isolation details.
- Turn Memory Integrity on.
- Restart your PC when Windows asks you to reboot.
- Launch Riot Client and open Valorant again.
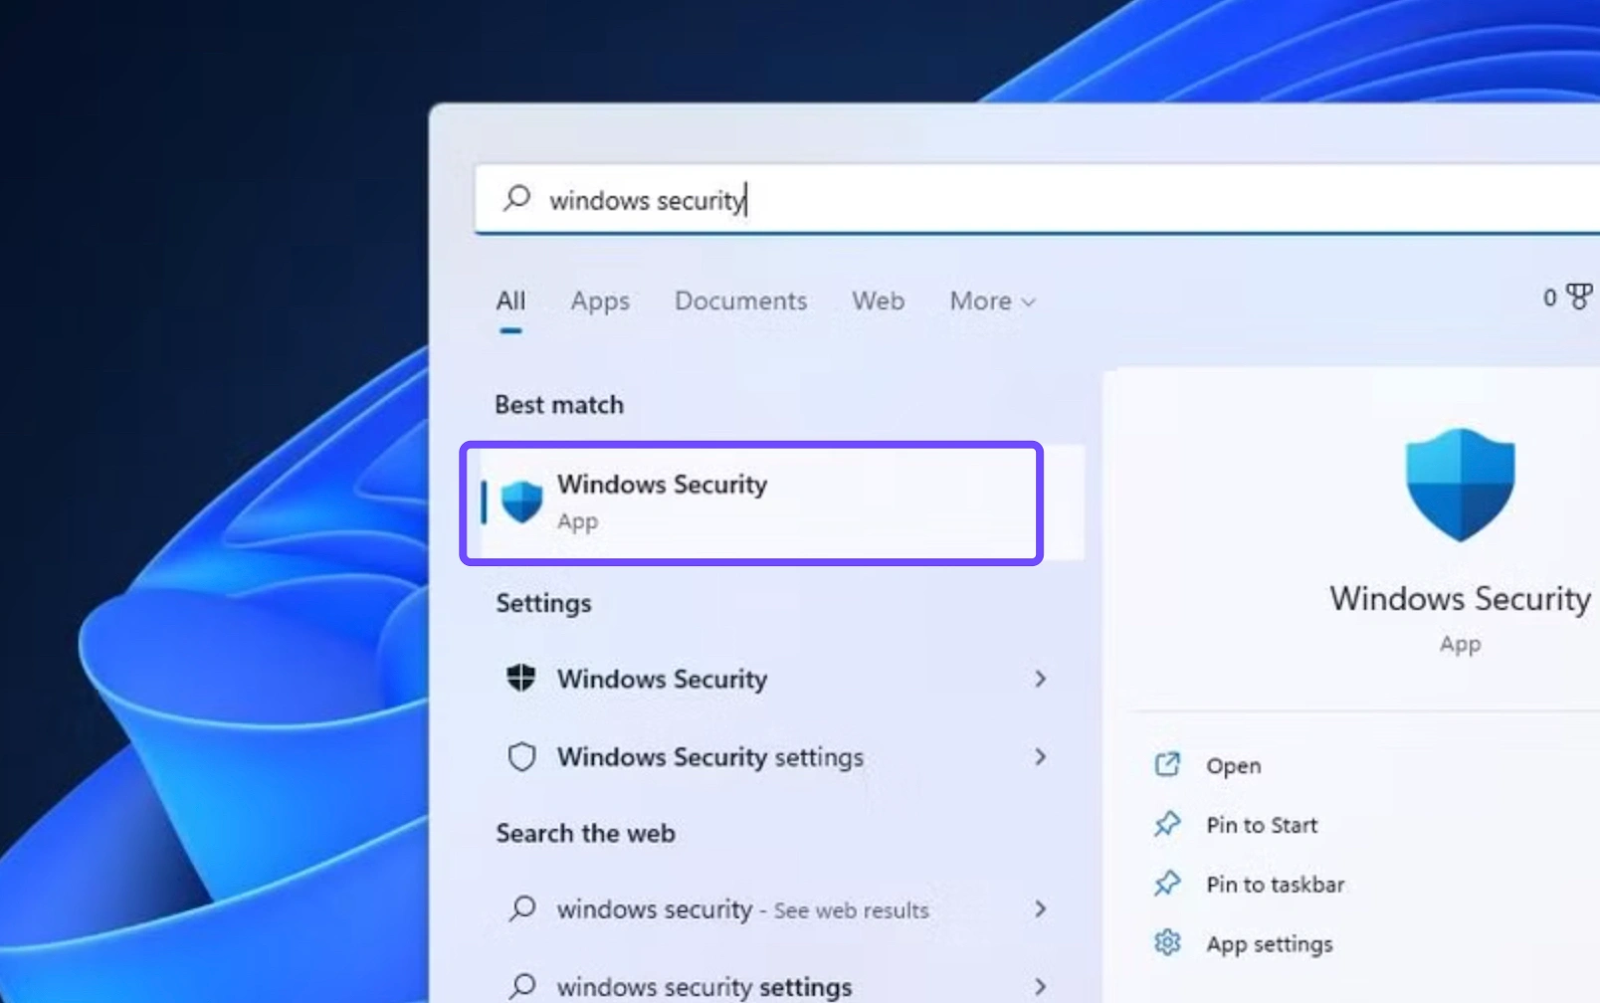
If Memory Integrity turns on successfully and remains enabled after restart, the VAN: RESTRICTION HVCI enabled error should disappear for many players.
Fix 2: If Memory Integrity Will Not Turn On, Check Incompatible Drivers
If Windows blocks Memory Integrity, it will often show a warning about incompatible drivers. This is one of the most common reasons players cannot fix the Valorant HVCI enabled error.
- Go back to Windows Security > Device Security > Core isolation details.
- Try turning on Memory Integrity.
- If Windows shows incompatible drivers, click Review incompatible drivers.
- Write down the driver names, file names, and device vendors.
- Update the related device software from the official manufacturer website.
- If the device is old or unused, uninstall the device and choose to delete the driver software when Windows offers that option.
- Restart the PC and try enabling Memory Integrity again.
Problematic drivers often come from old peripheral software, webcam drivers, virtual devices, emulators, controller tools, or outdated mouse and keyboard utilities. Some players also report legacy Logitech drivers blocking Memory Integrity.
Do not remove random system drivers. If you are not sure what a driver does, update the related software first instead of deleting it manually.
Fix 3: Enable Virtualization in BIOS if Core Isolation Is Missing
If you cannot find Core isolation or Memory Integrity in Windows Security, BIOS virtualization may be disabled. In that case, Windows may not be able to expose the HVCI option correctly.
- Restart your PC.
- Enter BIOS / UEFI setup. The key is often Del, F2, F10, or Esc, depending on your motherboard or laptop brand.
- Look for Intel VT-x, Intel Virtualization Technology, AMD-V, SVM Mode, or Virtualization.
- Enable the virtualization option.
- Save changes and boot back into Windows.
- Search for Core isolation again and turn on Memory Integrity.
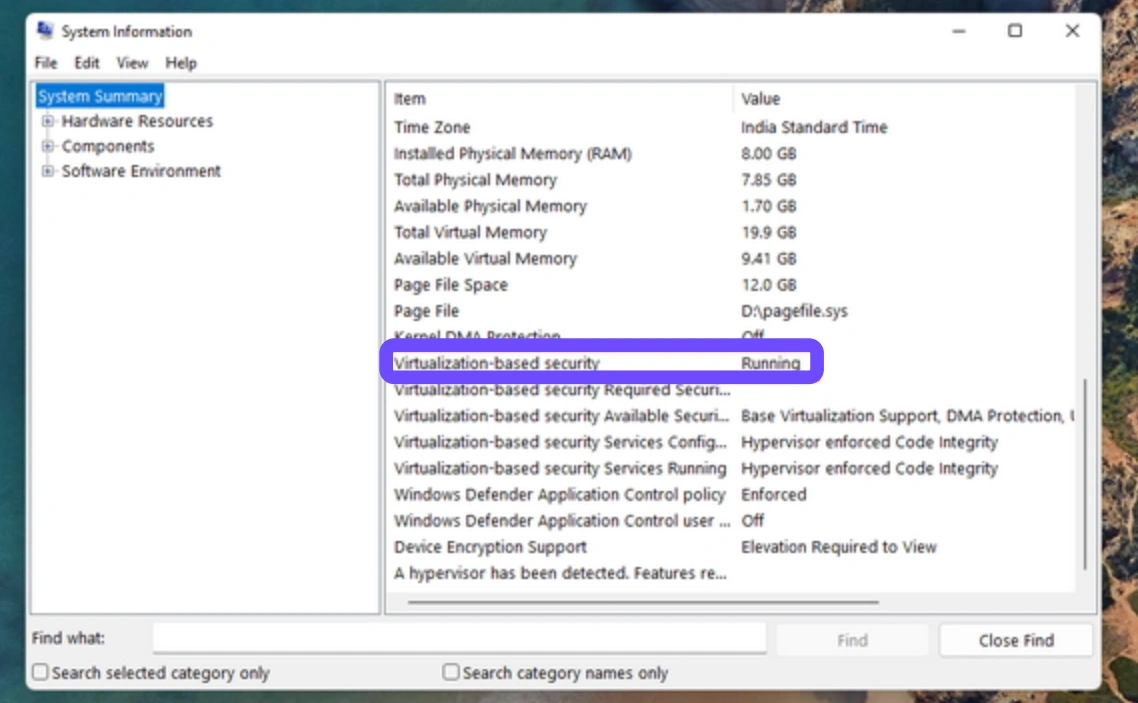
The exact BIOS menu name depends on the motherboard manufacturer. If you cannot find the option, search for the official manual for your motherboard or laptop model.
Fix 4: Turn On TPM 2.0, Secure Boot, and UEFI Mode
Valorant Vanguard restrictions are often connected. Even if the HVCI message is the one you see, Vanguard may also check TPM 2.0, Secure Boot, and UEFI mode. If Memory Integrity is enabled but the VAN restriction continues, check these settings next.
1. Check TPM 2.0:
- Press Win + R.
- Type tpm.msc and press Enter.
- Check whether TPM is ready for use and whether the specification version is 2.0
- If TPM is missing, enable Intel PTT or AMD fTPM in BIOS.
2. Check Secure Boot:
- Press Win + R.
- Type msinfo32 and press Enter.
- Look for Secure Boot State.
- If it is Off, enable Secure Boot in BIOS / UEFI.
3. Check UEFI mode:
In System Information, look for BIOS Mode. If it says Legacy, your system may not be using UEFI boot mode. Be careful: switching from Legacy/MBR to UEFI/GPT incorrectly can prevent Windows from booting. Back up important data and follow the official Microsoft or motherboard guidance before changing boot mode.
Fix 5: Update Windows, BIOS, and Device Drivers
Outdated Windows builds, old chipset drivers, and older BIOS firmware can stop Memory Integrity from working correctly. After checking Windows Security and BIOS virtualization, update your system environment.
- Run Windows Update and install available security updates.
- Update GPU drivers from NVIDIA, AMD, or Intel.
- Update chipset drivers from your motherboard or laptop manufacturer.
- Update peripheral software such as Logitech G HUB, Razer Synapse, Corsair iCUE, or controller utilities.
- Check your motherboard or laptop support page for BIOS updates if HVCI still will not stay enabled.
Fix 6: Reinstall Riot Vanguard
If the Windows security settings look correct but Valorant still shows the HVCI enabled VAN error, Riot Vanguard may need a clean reinstall.
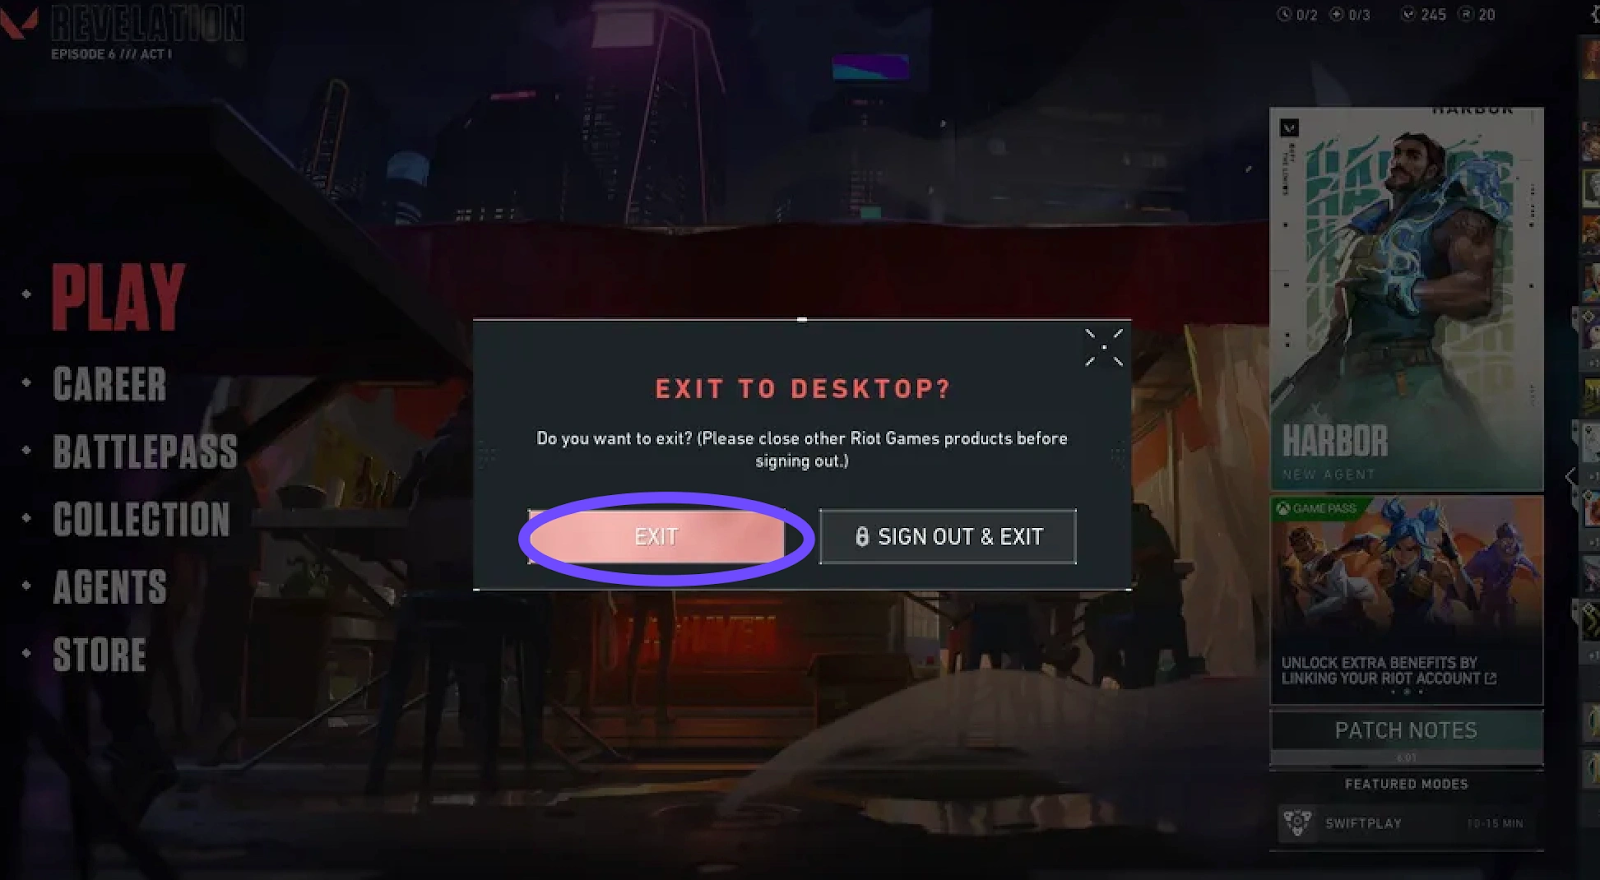
Step 1. Close Valorant and exit Riot Client completely
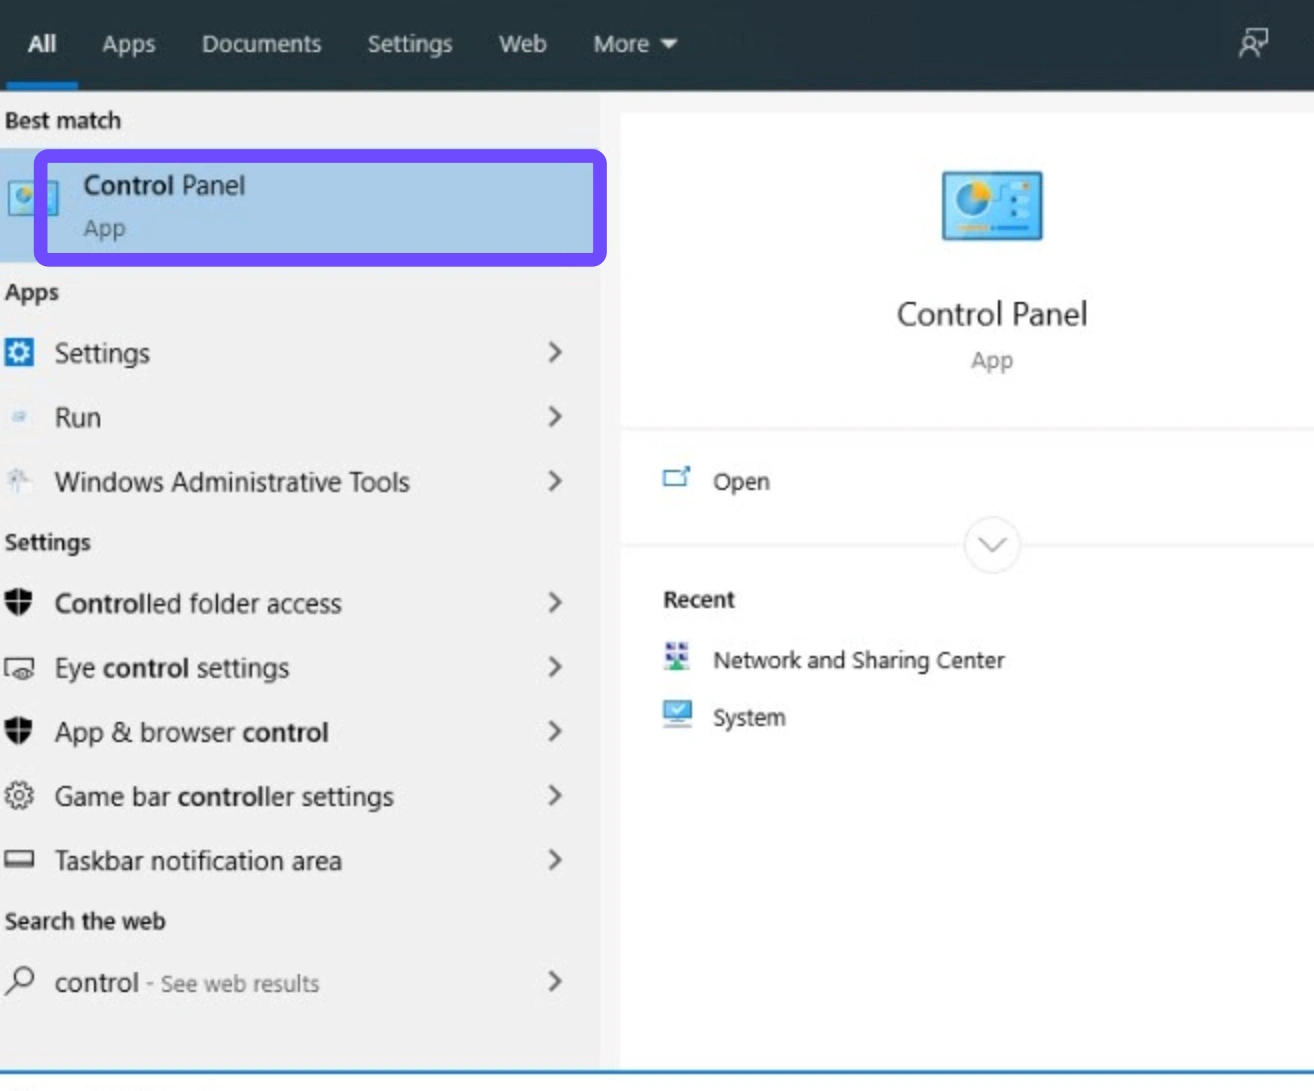
Step 2. Open Control Panel and uninstall Riot Vanguard
Step 3. Restart your PC to fully remove Vanguard services
Step 4. Launch Valorant to trigger automatic Vanguard reinstallation
Step 5. Restart again and test if the VAN error is resolved
Fix 7: Use LagoFast to Fix HVCI Enabled Error in Valorant
If you have already checked Memory Integrity, incompatible drivers, BIOS virtualization, TPM 2.0, Secure Boot, and Vanguard installation, LagoFast can help simplify the repair process with its Fix HVCI Enabled Error feature. This is useful for players who do not want to spend too much time switching between Windows Security, BIOS settings, driver pages, and Vanguard repair steps.
Step 1. Click the Free Trial button to download and install LagoFast.
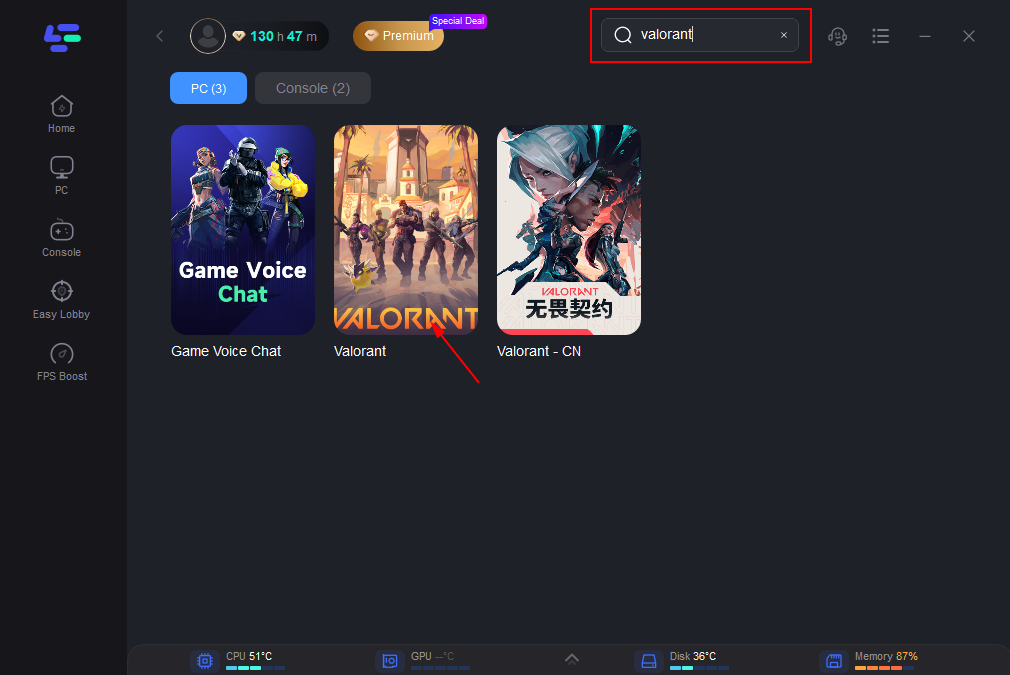
Step 2. Open LagoFast, then click the PC button on the left and search for Valorant in the search bar, and click it after it appears.
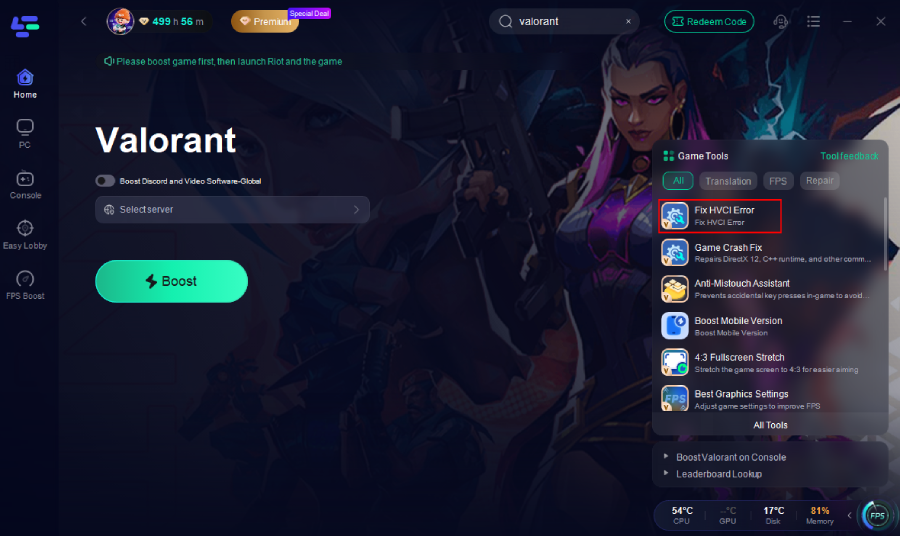
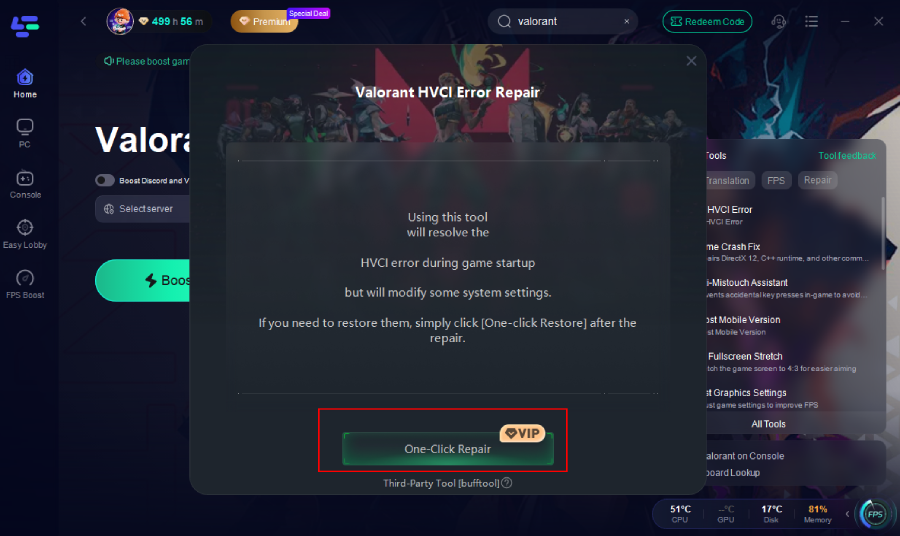
Step 3. Select the Fix HVCI Enabled Error option on the right side and click One-Click Fix to apply the repair.
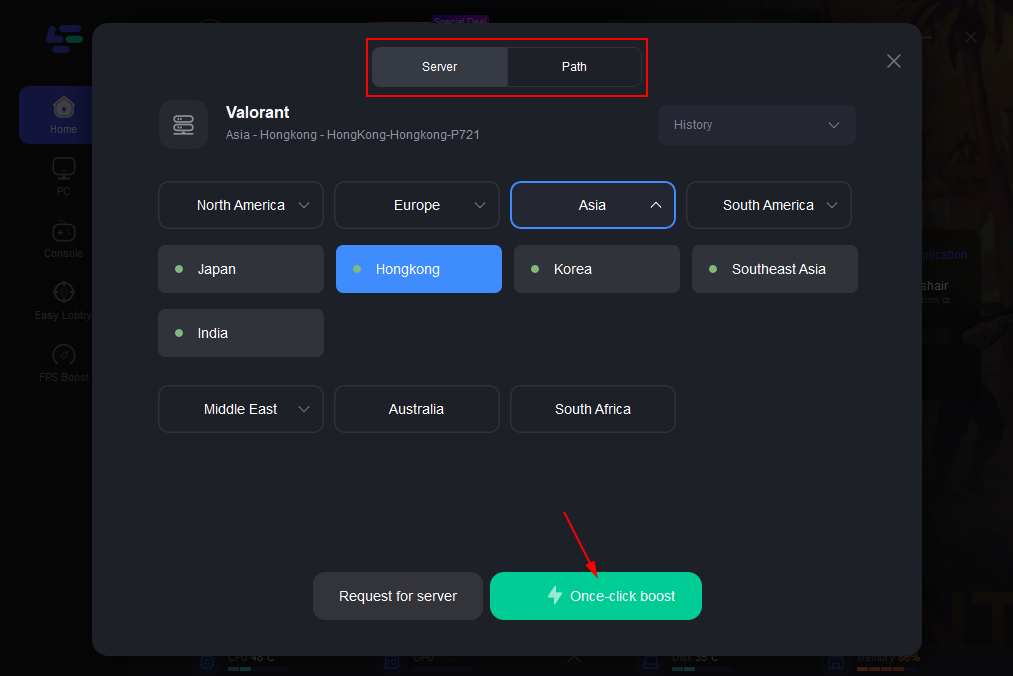
Step 4. Click on “Server” to change to a better server that optimizes the gaming experience, then click on “Smart Boost”.
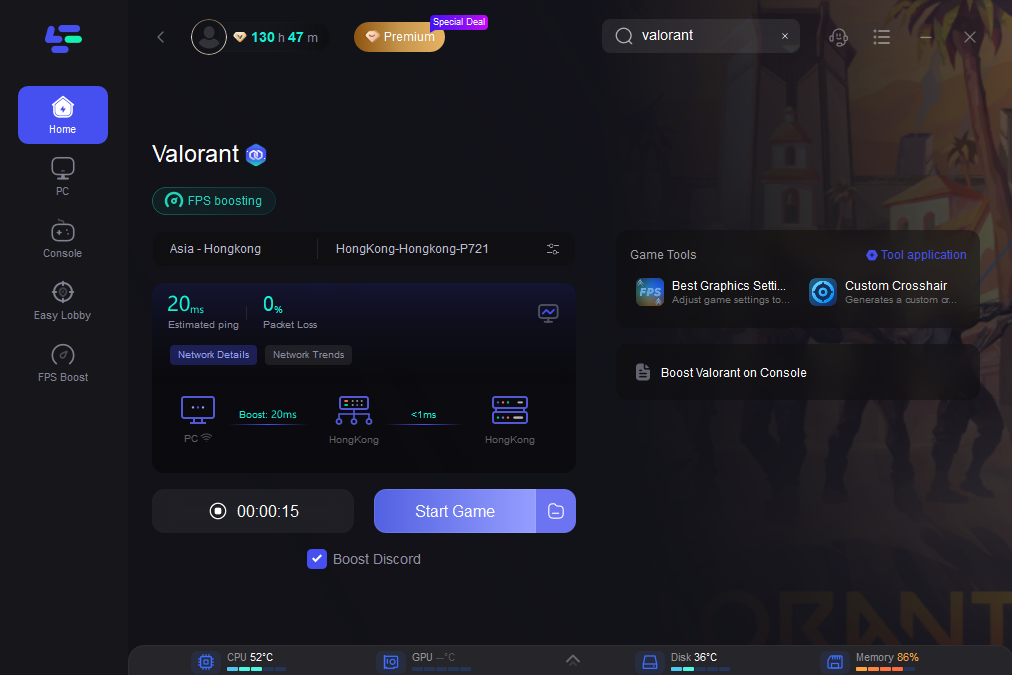
Step 5. Check the specific game ping, packet loss, and multiple path connections on the right side. Finally, click the “Start Game” to play the game.
Fix 8: What If Valorant Shows HVCI Enabled Only on One Account?
Some players report that the HVCI enabled error appears only on one Valorant account while another account works on the same PC. In this case, first confirm that the device itself meets the local requirements:
- Memory Integrity is enabled.
- Virtualization is enabled in BIOS/UEFI.
- TPM 2.0 is ready for use.
- Secure Boot is enabled.
- Riot Vanguard is installed correctly.
If all local settings are correct and the error still appears only on one account, contact Riot Support for account-specific help.
Optimize Valorant Connection After Fixing the HVCI Error
After Valorant launches normally again, you may still experience high ping, lag spikes, packet loss, or unstable server routes. This is where LagoFast can continue helping Valorant players with connection optimization.
With LagoFast, Valorant players can:
- Optimize the route to Valorant game servers.
- Check ping and packet loss before entering matches.
- Reduce lag caused by unstable network routes.
- Choose a smoother server connection path when available.
- Keep a more stable connection during competitive matches.
Boost Valorant with LagoFast
Fix the HVCI enabled error first, then use LagoFast to optimize ping, reduce lag, and improve server route stability for Valorant.
Does Enabling HVCI Cause FPS Drops, Stuttering, or Input Lag in Valorant?
Some players may notice performance changes after enabling Memory Integrity. Since HVCI adds an additional security layer to Windows, older systems or outdated drivers may feel less smooth after the setting is turned on.
If Valorant feels worse after fixing the HVCI error, try these steps:
- Update your GPU and chipset drivers.
- Close unnecessary overlays and background apps.
- Use a high-performance power plan on desktop PCs.
- Lower heavy graphics settings if FPS drops.
- Check ping and packet loss if the game feels delayed even when FPS is stable.
- Use LagoFast to optimize Valorant route stability and reduce lag caused by unstable network paths.
Related VAN Errors: HVCI vs Secure Boot vs TPM 2.0
HVCI enabled error is part of a broader group of Vanguard restriction messages. Players often confuse it with Secure Boot, TPM 2.0, VAN 9001, or VAN 9003 problems.
| Error Requirement | What It Usually Means | What to Check First |
|---|---|---|
| HVCI / Memory Integrity | Vanguard cannot verify that Memory Integrity is enabled and running correctly. | Windows Security > Device Security > Core isolation details. |
| Secure Boot | Vanguard cannot verify that Secure Boot is enabled in BIOS/UEFI. | System Information and BIOS/UEFI settings. |
| TPM 2.0 | Vanguard cannot verify a supported Trusted Platform Module. | Run tpm.msc and check TPM status. |
| UEFI / Legacy Boot | Windows may be installed in Legacy mode instead of UEFI mode. | Run msinfo32 and check BIOS Mode. |
| Vanguard Service | Riot Vanguard may be corrupted or not initialized after updates. | Reinstall Riot Vanguard and restart your PC. |
If you see more than one requirement in the VAN restriction message, fix them one by one. Start with Windows Security, then check drivers, virtualization, TPM 2.0, Secure Boot, UEFI mode, and Riot Vanguard.
FAQ
How do I fix HVCI enabled error in Valorant?
Turn on Memory Integrity in Windows Security, restart your PC, check incompatible drivers if the setting is blocked, enable virtualization in BIOS if Core isolation is missing, confirm TPM 2.0 and Secure Boot, and reinstall Riot Vanguard if needed. You can also use LagoFast’s HVCI fix feature to help handle the error.
How do I enable HVCI for Valorant on Windows 10?
Go to Settings > Update & Security > Windows Security > Device Security > Core isolation details, turn on Memory Integrity, and restart your PC.
How do I enable HVCI for Valorant on Windows 11?
Open Windows Security, go to Device Security, click Core isolation details, turn on Memory Integrity, and restart your PC.
How do I enable HVCI in BIOS?
You usually enable virtualization in BIOS instead of enabling HVCI directly. Restart your PC, enter BIOS/UEFI, find Intel VT-x, Intel Virtualization Technology, AMD-V, SVM Mode, or Virtualization, enable it, save changes, and then turn on Memory Integrity in Windows Security.
Why can’t I turn on Memory Integrity?
Memory Integrity may be blocked by incompatible drivers, disabled BIOS virtualization, outdated firmware, missing TPM support, or device management policies.
Why does Memory Integrity turn off after restart?
This usually means a driver, BIOS, or policy-level setting is preventing HVCI from staying active. Check incompatible drivers, virtualization, TPM 2.0, Secure Boot, Windows updates, and chipset drivers.
Why does Valorant show HVCI enabled only on one account?
If other accounts work on the same PC, first confirm that Memory Integrity, virtualization, TPM 2.0, Secure Boot, and Riot Vanguard are working correctly. If the error only affects one account after local settings are confirmed, contact Riot Support.
Conclusion
The HVCI enabled VAN error in Valorant usually appears when Vanguard cannot verify that required Windows security settings are working correctly. Start by enabling Memory Integrity, checking incompatible drivers, enabling BIOS virtualization, confirming TPM 2.0 and Secure Boot, and reinstalling Riot Vanguard if needed.
For players who want a simpler repair path, LagoFast offers a Fix HVCI Enabled Error feature for Valorant. Once the game launches normally, you can also use LagoFast to optimize your Valorant connection, reduce lag, check packet loss, and improve server route stability.

Boost Your Game with LagoFast for Epic Speed
Play harder, faster. LagoFast game booster eliminates stutter and lags on PC, mobile, or Mac—win every match!
Quickly Reduce Game Lag and Ping!
Boost FPS for Smoother Gameplay!