

Palworld officially reached Version 1.0 on , making this a good time to create a persistent world for your group. A dedicated server allows the world to keep running without requiring the host to leave the Palworld game client open.
This guide explains how to create a Palworld 1.0 dedicated server with Steam or SteamCMD, configure its basic settings, open the required network port, and let friends join through the server address. It also covers an easier hosted option for players who do not want to maintain a server on their own PC.
Why Create a Palworld Dedicated Server?
A dedicated server runs separately from the Palworld game client. This makes it useful for groups that want a shared world that does not depend on one player keeping the game open throughout every session.
A Palworld dedicated server can provide the following benefits:
- A persistent multiplayer world: The server can remain available while the server program is running, even when the owner is not playing.
- Independent server settings: The owner can configure the server name, password, player limit, difficulty, resource rates, and other rules.
- A consistent joining method: Friends can connect through the server's IP address and port.
- Separate game and server workloads: The server can run on another PC or hosted machine instead of the owner's main gaming device.
- More control over maintenance: The owner decides when to update, restart, back up, or change the world settings.
The tradeoff is that self-hosting requires suitable hardware, an internet connection that accepts incoming traffic, firewall configuration, router port forwarding, updates, and regular maintenance.
Palworld 1.0 Dedicated Server Requirements
Before installing the server, confirm that the host system meets the official operating requirements. Running the server on underpowered hardware may cause slow loading, instability, or save-data problems.
| Component | Official Guidance | Practical Note |
|---|---|---|
| CPU | 4 cores or more recommended | More active players and larger bases can increase server load. |
| Memory | 16 GB | More than 32 GB is recommended for a larger server. |
| Storage | Fast SSD recommended | Keep additional free space for saves, updates, logs, and backups. |
| Network | UDP port 8211 by default | The router must support port forwarding for external connections. |
| Operating system | 64-bit Windows or Linux | This guide focuses on the Steam and SteamCMD setup paths. |
Choose a Palworld Dedicated Server Setup Method
| Method | Best For | Difficulty | Maintenance |
|---|---|---|---|
| Steam client | Beginners setting up a server on a Windows PC | Low | Manual updates and local network configuration |
| SteamCMD on Windows | Server owners who prefer command-line management | Medium | Manual commands, updates, firewall, and router configuration |
| SteamCMD on Linux | Experienced administrators running a separate server machine | High | Linux, network, security, and server-process management |
| LagoFast hosted server | Players who do not want to deploy and maintain the server locally | Low | Configuration through the provided server tools |
Method 1: Set Up a Palworld Dedicated Server Through Steam
The Steam client method is the simplest option for users who have not managed a game server before.
Step 1: Find the Palworld Dedicated Server Tool
- Open Steam and go to your Library.
- Open the Library filter menu.
- Enable Tools so that server applications appear.
- Search for Palworld Dedicated Server.
- Install the tool on the server PC.
Step 2: Start the Server Once
- Launch Palworld Dedicated Server from Steam.
- Select the normal dedicated server startup option.
- Click Play.
- Keep the server window open while the server is running.
The first startup creates the directories needed for the server configuration file. Allow the server to start successfully before closing it and editing the settings.
Step 3: Update the Server
Keep the server installation updated whenever Palworld receives a new version. Players may be unable to join when the game client and server are running incompatible versions.
Method 2: Set Up a Palworld Dedicated Server With SteamCMD
SteamCMD allows the server owner to download and update the Palworld server through commands. It is useful for a separate Windows or Linux server that does not need the full Steam client interface.
Install or Update the Server
Open SteamCMD and run:
steamcmd +login anonymous +app_update 2394010 validate +quitThis downloads or validates the Palworld Dedicated Server application.
Start the Server on Windows
Move to the installation directory:
cd .\steamapps\common\PalServerThen start the server:
PalServer.exeStart the Server on Linux
Move to the PalServer directory:
cd ~/Steam/steamapps/common/PalServerThen run:
./PalServer.shHow to Configure a Palworld 1.0 Dedicated Server
Start the server at least once before looking for the configuration directories. The required folders are created during the initial startup.
Windows Configuration File
The active Windows configuration file is located at:
steamapps\common\PalServer\Pal\Saved\Config\WindowsServer\PalWorldSettings.iniIf the active file has not been created, copy the official default settings file:
Copy-Item steamapps\common\PalServer\DefaultPalWorldSettings.ini steamapps\common\PalServer\Pal\Saved\Config\WindowsServer\PalWorldSettings.iniLinux Configuration File
The active Linux configuration file is located at:
steamapps/common/PalServer/Pal/Saved/Config/LinuxServer/PalWorldSettings.iniCopy the default configuration with:
cp steamapps/common/PalServer/DefaultPalWorldSettings.ini steamapps/common/PalServer/Pal/Saved/Config/LinuxServer/PalWorldSettings.iniUseful Settings to Review
| Setting | Purpose |
|---|---|
ServerName |
Sets the name displayed for the server. |
ServerDescription |
Adds a description for the server. |
ServerPassword |
Requires players to enter a password before joining. |
AdminPassword |
Controls access to administrative privileges. |
ServerPlayerMaxNum |
Sets the maximum number of players allowed on the server. |
Difficulty |
Controls the selected difficulty configuration. |
ExpRate |
Changes the experience gain multiplier. |
PalCaptureRate |
Changes the Pal capture-rate multiplier. |
DayTimeSpeedRate |
Changes the speed of daytime progression. |
NightTimeSpeedRate |
Changes the speed of nighttime progression. |
bIsUseBackupSaveData |
Enables Palworld's server save-data backup function. |
Stop the server before changing the configuration file. Save the file, restart the server, and confirm that the updated values have been applied.
Review the official Palworld 1.0 configuration parameter guide before changing advanced settings.
Set Up the Palworld Server Port and Firewall
Installing the server is not enough for friends outside your home network to connect. The host must also allow incoming server traffic.
1. Confirm the Listening Port
Palworld uses 8211/UDP as the default dedicated server port. The port is changeable, but every part of the setup must use the same value.
2. Create a Firewall Rule
Allow the Palworld server application and the selected UDP port through the server machine's firewall. Do not permanently disable the entire firewall as a workaround.
3. Configure Router Port Forwarding
If the server is hosted behind a home router, forward the selected UDP port to the local IP address of the server PC.
A typical rule contains:
- Protocol: UDP
- External port: 8211, unless changed
- Internal port: The same listening port
- Destination: The local IP address of the Palworld server PC
4. Test From Outside the Host Network
A connection from the same local network does not prove that the server is reachable from the internet. Ask a trusted player on another network to test the public address.
If local connections work but external connections fail, review the public IP address, firewall rule, UDP port forwarding, and whether the internet connection accepts incoming connections.
Dedicated Server vs Community Server in Palworld
A standard dedicated server is joined by entering its IP address and port. A community server is a dedicated server that is also registered in the server list inside the game.
To start the server as a community server, add the official -publiclobby startup option.
Windows Example
PalServer.exe -publiclobbyLinux Example
./PalServer.sh -publiclobbyThe community-server settings PublicIP and PublicPort can be used when automatic detection does not work correctly. However, changing PublicPort does not change the server's actual listening port. The startup settings, firewall, router rule, and public listing must remain consistent.
How to Join a Palworld Dedicated Server
- Start Palworld.
- Open the multiplayer server menu.
- Locate the server-address field below the server list.
- Enter the public IP address and port in the format
IP:PORT. - Select the connect option.
- Enter the server password when required.
Example format:
203.0.113.10:8211The address above is only an example. Players must use the actual server address supplied by the server owner.
For a community server, open the Community Server list, locate the server name, and select it from the results.
An Easier Way to Host a Palworld Dedicated Server
Self-hosting gives the owner direct control, but it also requires suitable hardware, server updates, firewall rules, router configuration, backups, and a host machine that stays online.
Players who prefer a simpler setup can use a LagoFast Palworld Dedicated Server instead of deploying and maintaining the complete environment on a personal PC.
Why Choose LagoFast Palworld Server Hosting?
- Instant Setup: Begin configuring the server without manually installing the dedicated server on a local PC.
- Easy Configuration: Manage common server parameters through a visual panel.
- High-Performance Hosting: Run the world on server hardware intended for persistent multiplayer hosting.
- Automatic Data Backup: Protect game data with backup and rollback support.
- Multiple Server Regions: Select from available server locations based on the needs of the player group.
Self-Hosted vs LagoFast Hosted Server
| Factor | Self-Hosted Server | LagoFast Hosted Server |
|---|---|---|
| Initial deployment | Install and configure the server manually | Server service is prepared after purchase |
| Host hardware | Requires a suitable local or rented machine | Uses hosted server resources |
| Configuration | Edit configuration files manually | Manage supported settings through a visual panel |
| Router setup | May require local port forwarding | Does not depend on the buyer's home router for server hosting |
| Backups | The owner must plan and maintain backups | Automatic data backup and rollback support |
| Best suited for | Users who want direct system-level control | Players who want a faster and simpler hosting path |
Start Your Palworld Server
Choose an available server region, complete the order, and then configure the Palworld world for your group.
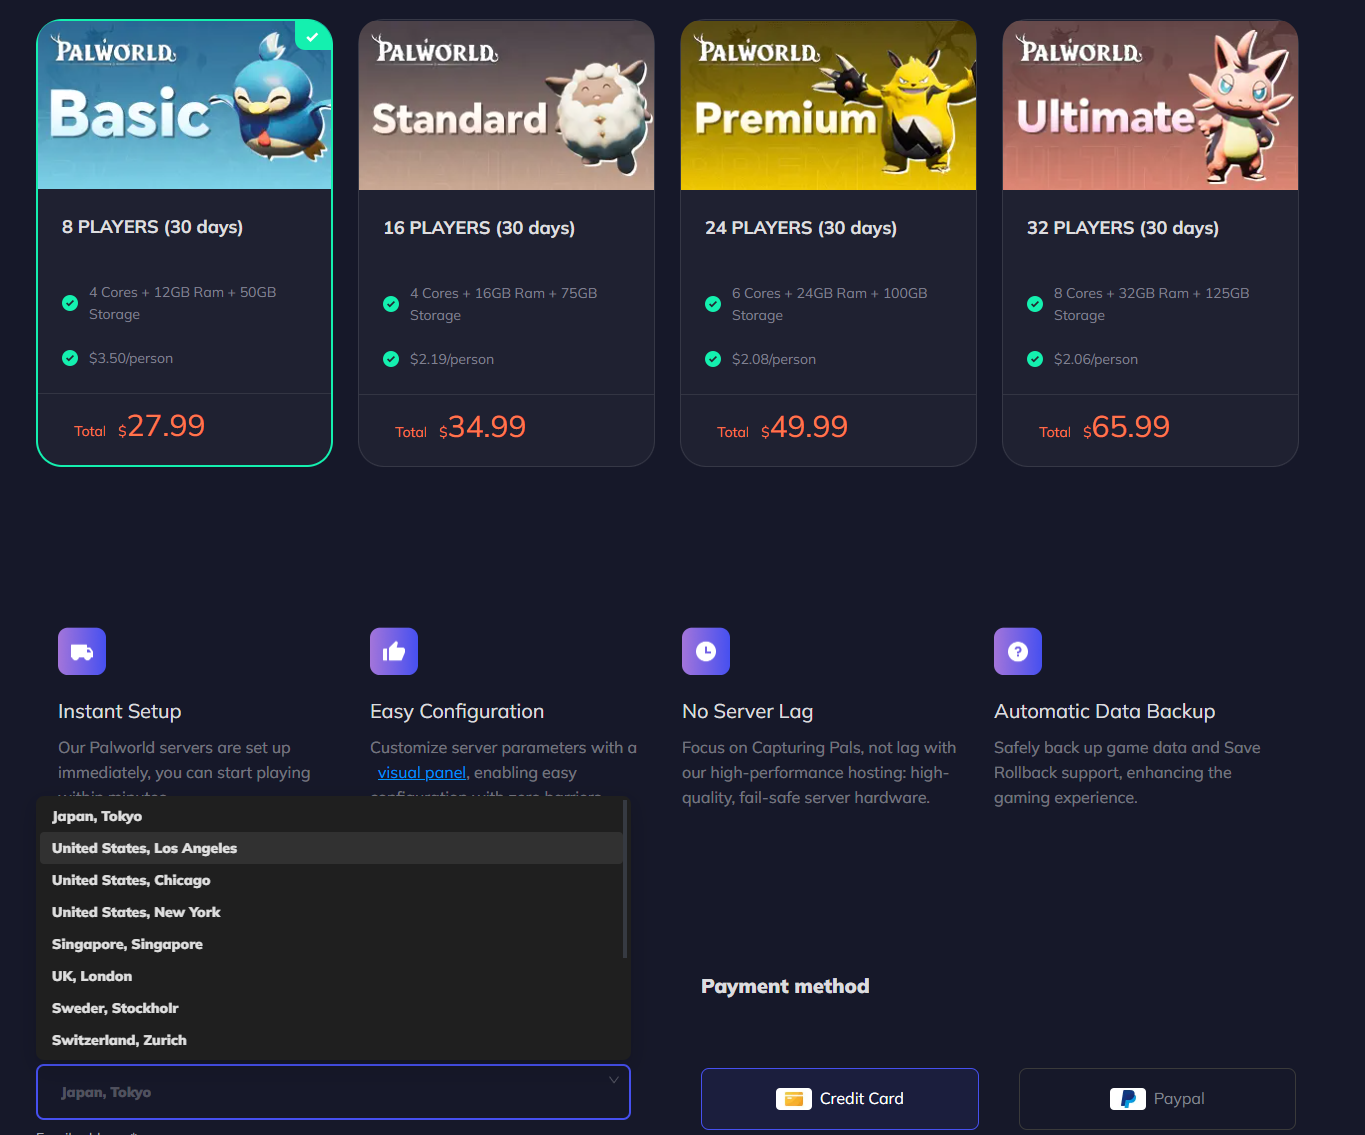
Already purchased a server? Follow the Palworld Server Setup Guide to open the visual panel, update the settings, restart the server, and join through the provided server address.
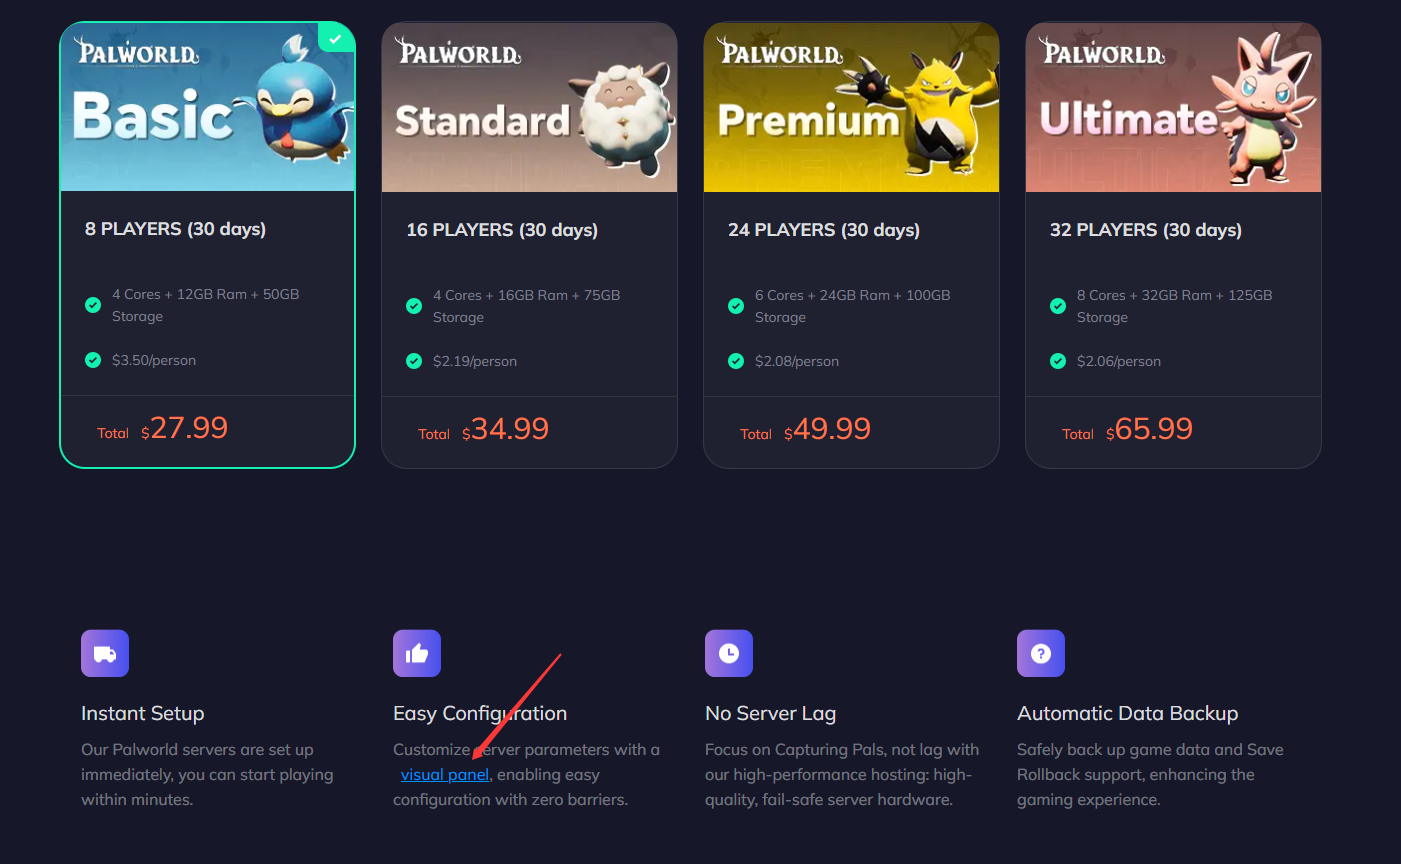
Step 1. After purchasing a server, save your server information, then download ‘Visual Panel’ from the homepage
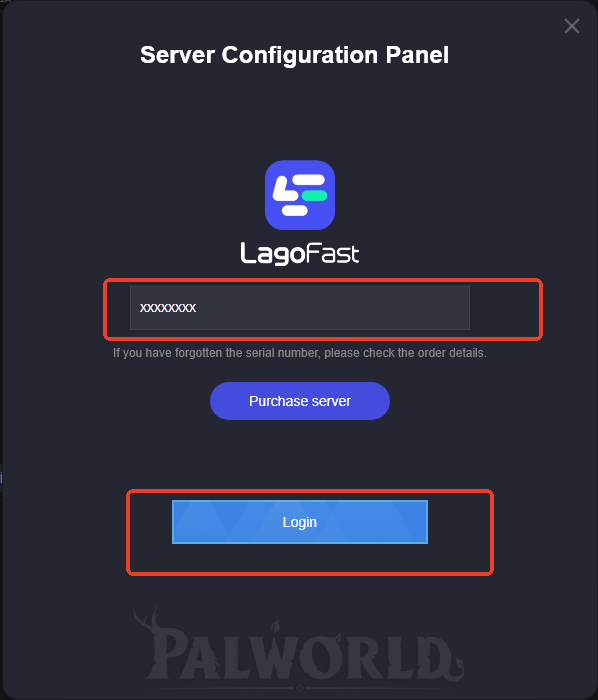
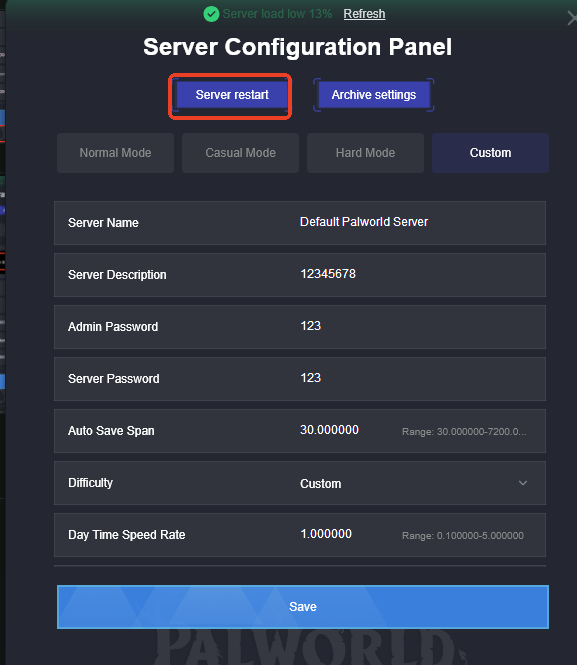
Step 2. Open the ‘panel tool’ you downloaded, enter the IP address you received after purchasing the server, and log in.
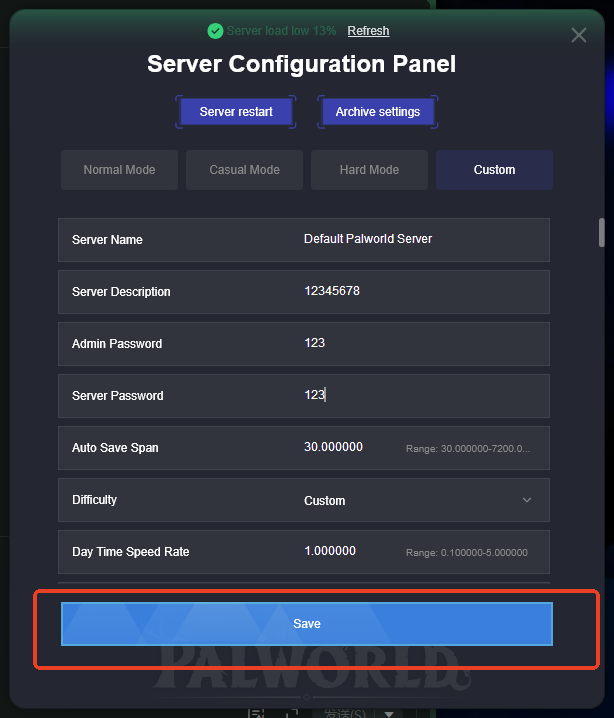
Step 3. Once you've successfully logged in and accessed the control panel, you can adjust the server settings. Change the values to your desired settings, then click "Save."
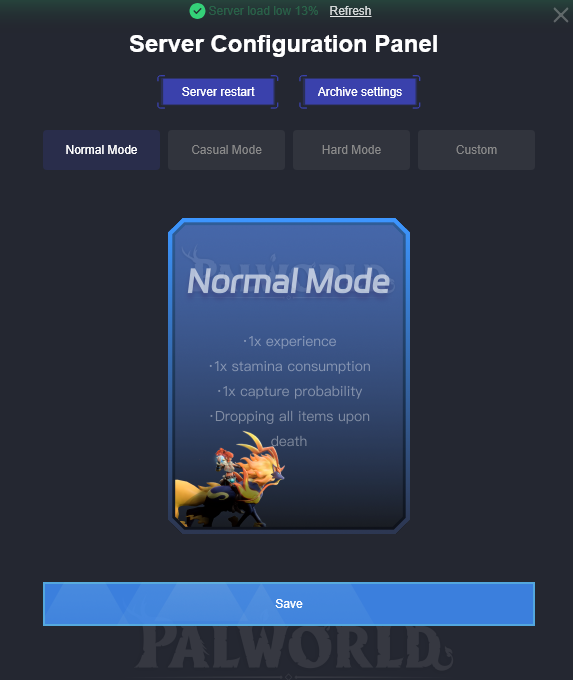
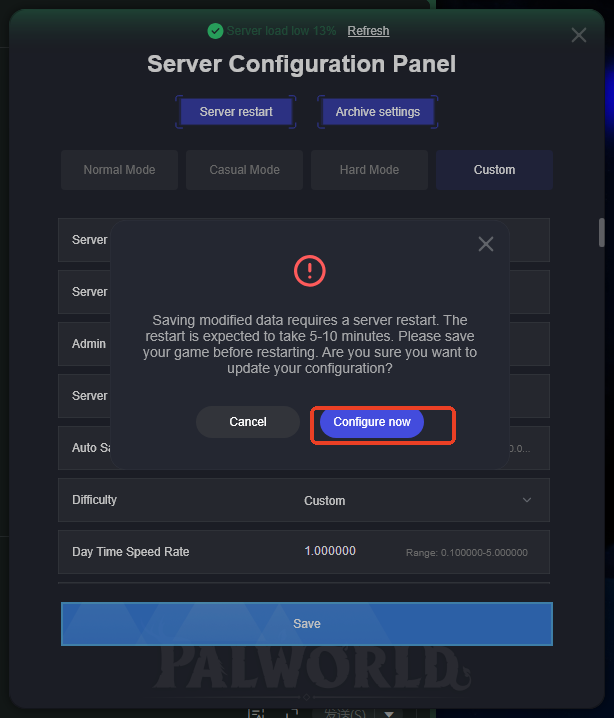
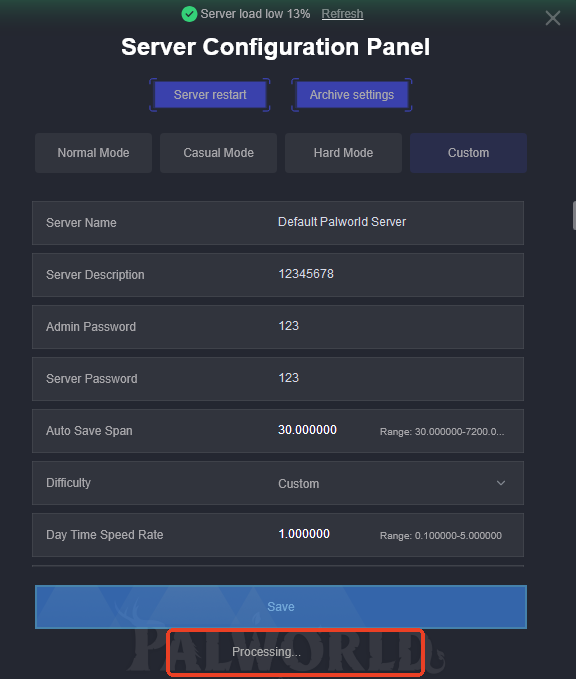
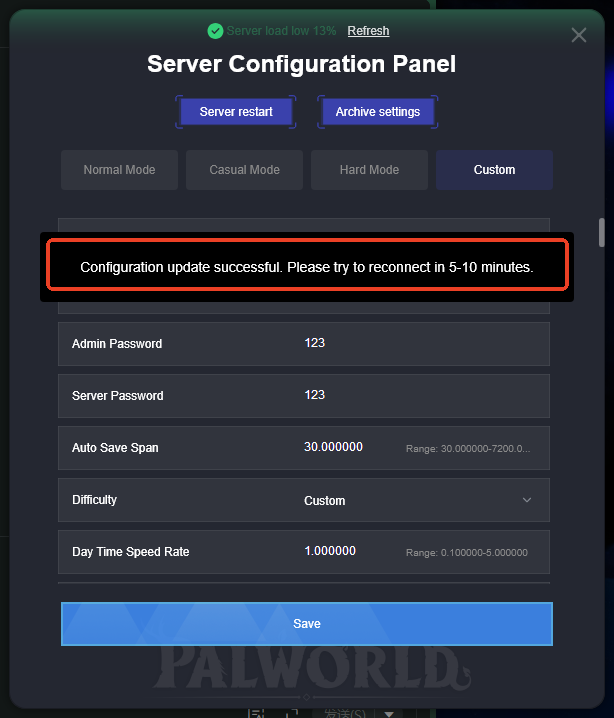
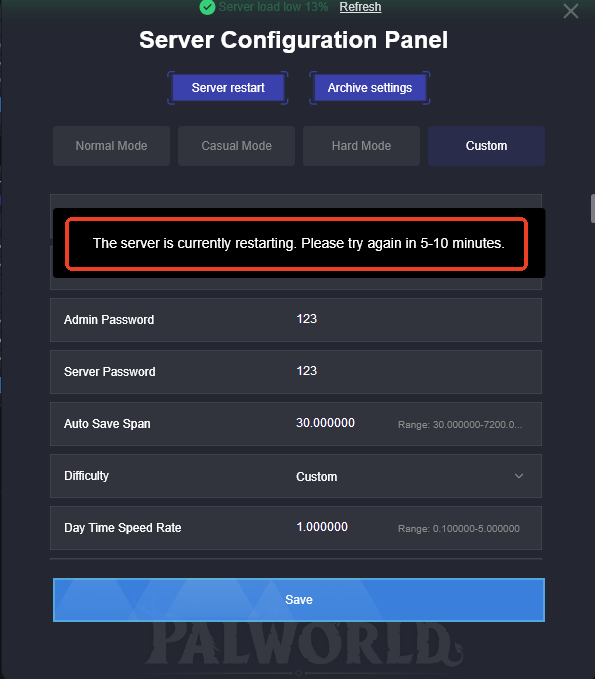
Step 4.Waiting for the parameters to be saved successfully,please restart the server after the settings have been saved successfully.
Palworld Dedicated Server Troubleshooting
The Server Starts but Friends Cannot Join
- Confirm that the server process is still running.
- Verify the public IP address and listening port.
- Check that the firewall allows the selected UDP port.
- Confirm that the router forwards the port to the correct local device.
- Make sure the game client and server are updated.
- Ask a player on another network to test the connection.
For a more detailed diagnostic flow, see the Palworld Connection Timed Out troubleshooting guide .
The Server Settings Do Not Change
- Make sure the server was stopped before editing the file.
- Confirm that you edited
PalWorldSettings.ini, not only the default template. - Check that the file is in the correct WindowsServer or LinuxServer directory.
- Save the file and restart the server.
- Review the syntax carefully if the server fails to start after an edit.
The Server Crashes or Uses Too Much Memory
- Confirm that the host has enough available memory.
- Close unnecessary applications on the server machine.
- Use an SSD and keep sufficient free storage space.
- Review settings that increase server load, including high player or base limits.
- Restart the server during a planned maintenance period.
- Check the server logs for errors before changing several settings at once.
The Server Does Not Appear in the Community List
- Confirm that the server was started with
-publiclobby. - Check the public IP and public port settings.
- Confirm that the listening port is open and reachable.
- Try joining directly with the IP address and port.
Other Multiplayer Features Are Not Working
If the problem also affects multiplayer menus, friend-hosted worlds, or invitations, use the Palworld multiplayer troubleshooting guide .

Boost Your Game with LagoFast for Epic Speed
Play harder, faster. LagoFast game booster eliminates stutter and lags on PC, mobile, or Mac—win every match!
Quickly Reduce Game Lag and Ping!
Boost FPS for Smoother Gameplay!