
Setting up a local or hosted server lets you build and explore with friends without relying on official multiplayer worlds. However, many players experience situations where a server that worked previously suddenly stops functioning. When a RuneScape Dragonwilds dedicated server is not working, players often encounter missing server lists, endless loading screens, or sudden disconnections. This guide breaks down every common server error and provides clear steps to restore your multiplayer session.

- ✅ Reduce Lag and High Ping.
- ✅ Boost FPS at the Same Time.
- ✅ Support 8000+ Popular Online Games.
- ✅ Stable Server Connection
Part 1: Identify Your Dragonwilds Dedicated Server Problem
Part 2: Quick Fixes for RuneScape Dragonwilds Dedicated Server
Part 3: Fix Dragonwilds Dedicated Server Not Working in Different Situations
Part 4: How LagoFast Keeps Your Dragonwilds Dedicated Server Connection Stable
Part 5: How to Protect Your World Save Before Reinstalling or Resetting the Server
Part 6: RuneScape Dragonwilds Dedicated Server FAQs
Part 1: Identify Your Dragonwilds Dedicated Server Problem
Before attempting complex technical fixes, you need to identify the exact symptom your server is displaying. Server problems usually fall into distinct categories, each requiring a specific solution.
The table below matches common error behaviors with their root causes and initial troubleshooting steps.
|
Error Symptom |
Possible Root Cause |
Start With |
|
Dragonwilds dedicated server can't connect |
Closed firewall ports or router NAT issues |
Check port forwarding rules |
|
Dragonwilds server not showing in server list |
Steam master server query failure or filter bug |
Test Direct Connect via IP |
|
Dragonwilds dedicated server black screen |
Corrupted player save data or asset loading timeout |
Clear local client cache files |
|
Dragonwilds network connection was interrupted |
Packet loss, unstable routing, or server overload |
Verify network integrity |
|
Dragonwilds dedicated server keeps crashing |
RAM exhaustion, bad config file, or missing dependencies |
Check server crash log files |
|
Dragonwilds dedicated server not working after update |
Mismatched build version between client and server |
Force update server via SteamCMD |
Part 2: Quick Fixes for RuneScape Dragonwilds Dedicated Server
If your server was working recently and stopped without configuration changes, perform these fast checks first. These general steps resolve over half of all connection hiccups.
- Restart Server and Client Software: Close the server console and your game client completely, then relaunch both.
- Verify Build Versions: Ensure your game client and dedicated server share the exact same version number.
- Check Server Console Outputs: Look at the terminal window hosting the server for red text or fatal startup errors.
- Reboot Network Equipment: Restart your router and modem to clear cached DNS entries and stale NAT tables.
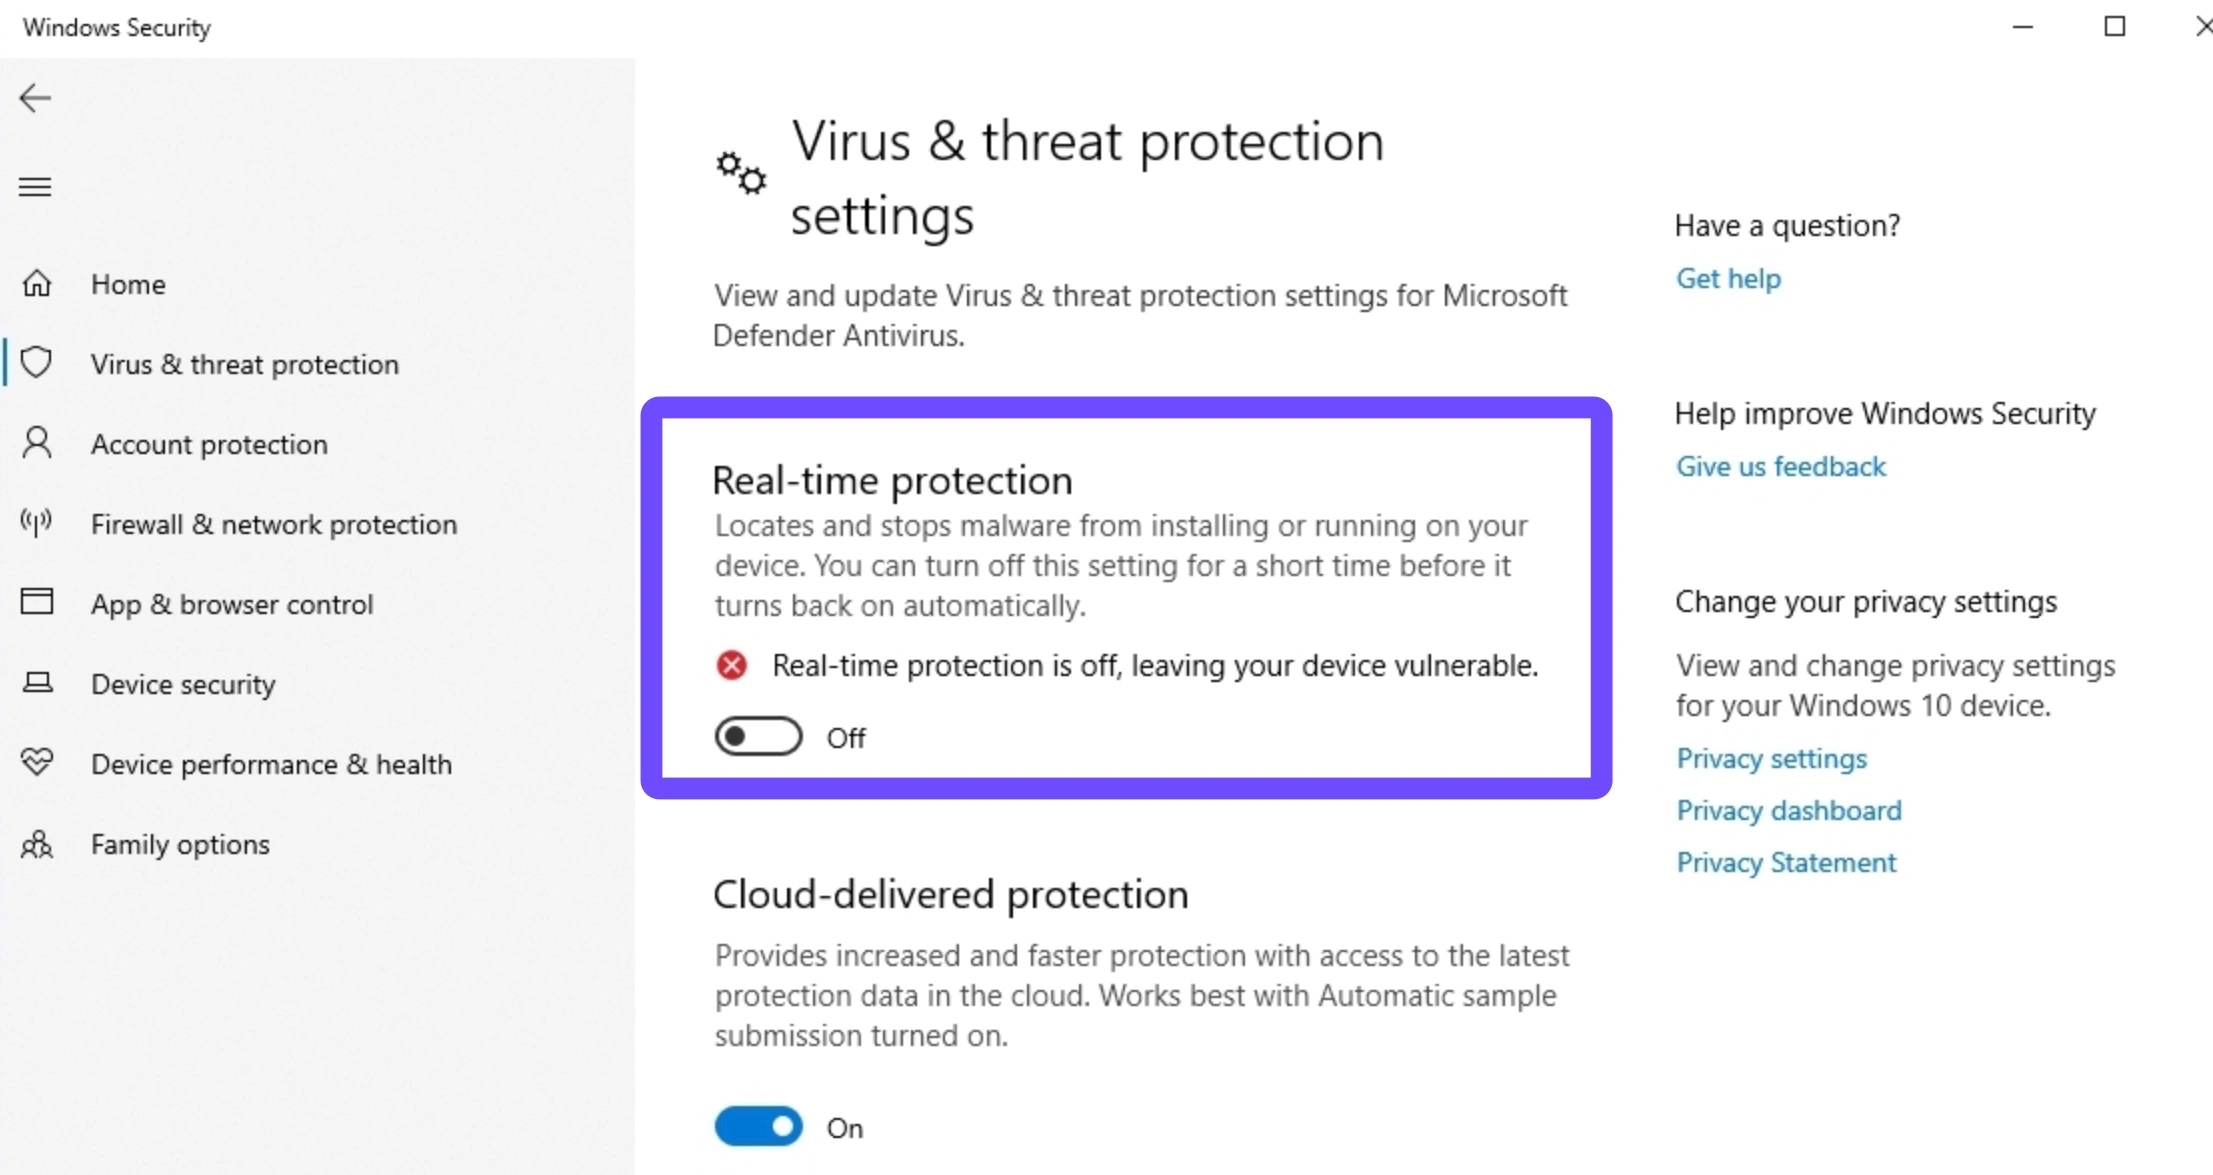
- Disable Security Software Temporarily: Turn off Windows Defender Firewall briefly to test if it blocks incoming traffic.
- Backup and Audit Config Files: Double-check your config files for syntax errors or typos added during recent edits.
Part 3: Fix Dragonwilds Dedicated Server Not Working in Different Situations
Specific server errors require tailored solutions. Follow the detailed steps below based on the precise issue you encounter while hosting or joining.
Can't Connect to the Dedicated Server
When a Dragonwilds dedicated server connection failed message appears, the client cannot establish a handshake with the host IP address. This usually indicates a blocked port or network restriction.
Step 1: Open Windows Firewall with Advanced Security on the host computer.
Step 2: Create a new Inbound Rule for Ports, select UDP/TCP, and enter your server game ports.
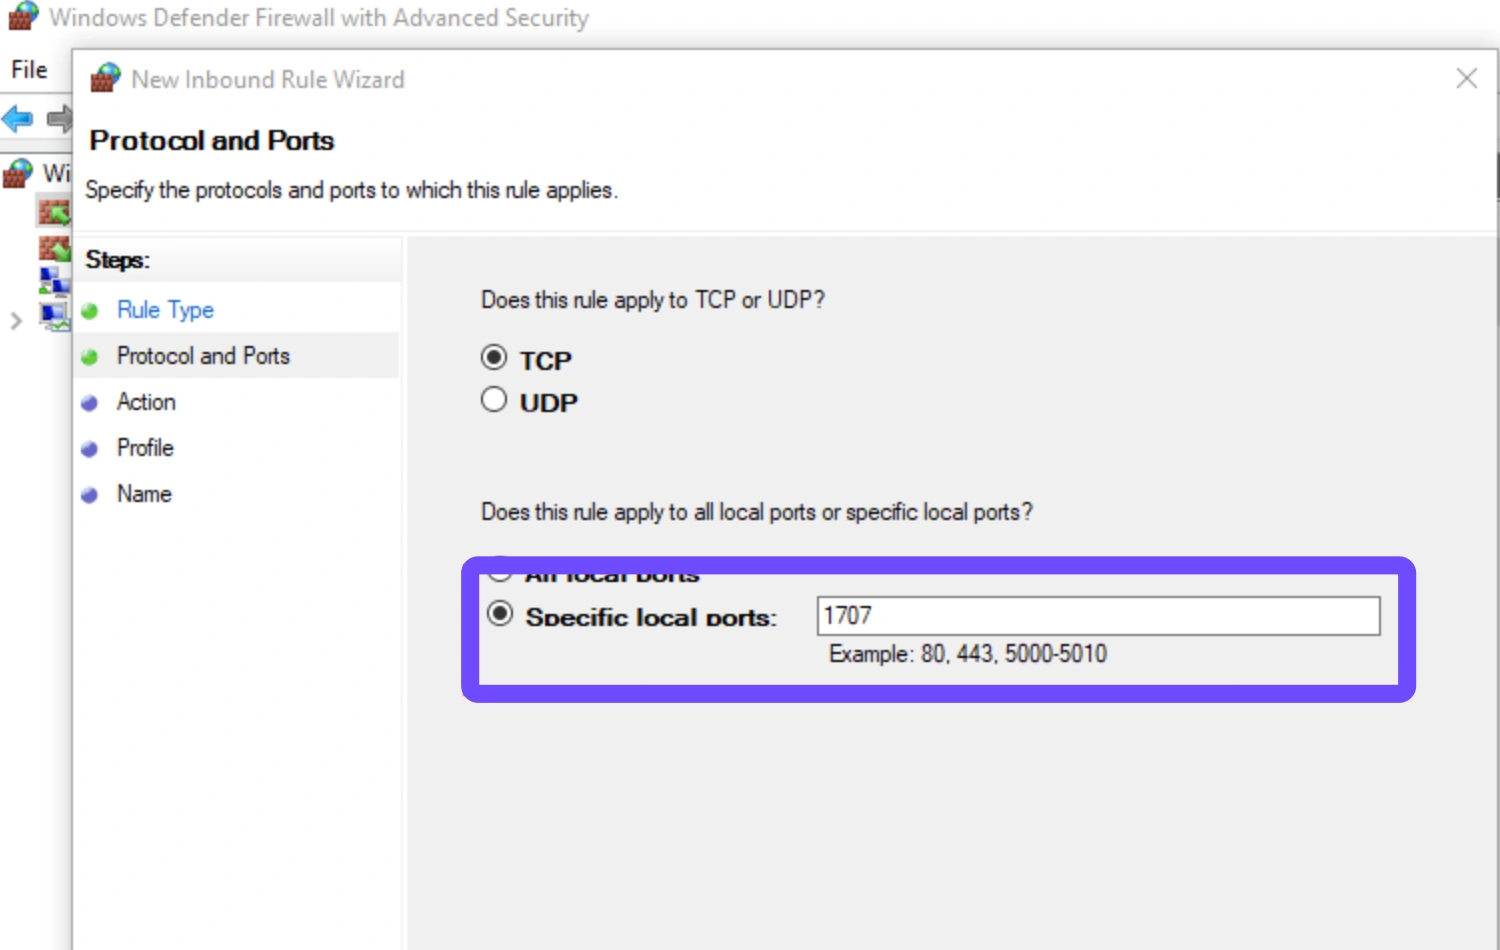
Step 3: Access your router management console and forward the required game ports to your local host IP.
Step 4: Ensure your public IP address has not changed if your ISP uses dynamic IP allocation.
Dedicated Server Not Showing in the Server List
When a Dragonwilds dedicated server is not showing up in public server browser lists, the server fails to report its state to the Steam master server directory.
Step 1: Open your server configuration file and confirm the public broadcast setting is set to true.
Step 2: Add your server port plus one or two additional query ports to your firewall open list.
Step 3: Use the Steam client Server Favorites menu to add your IP and port manually.
Step 4: Launch the game and refresh the favorites tab instead of relying on the in-game public browser.
Black Screen When Joining or Rejoining the Server
Experiencing a Dragonwilds black screen joining server attempt usually means world data is stuck loading, or player character files are desynced.
Step 1: Force close the game client using Task Manager.
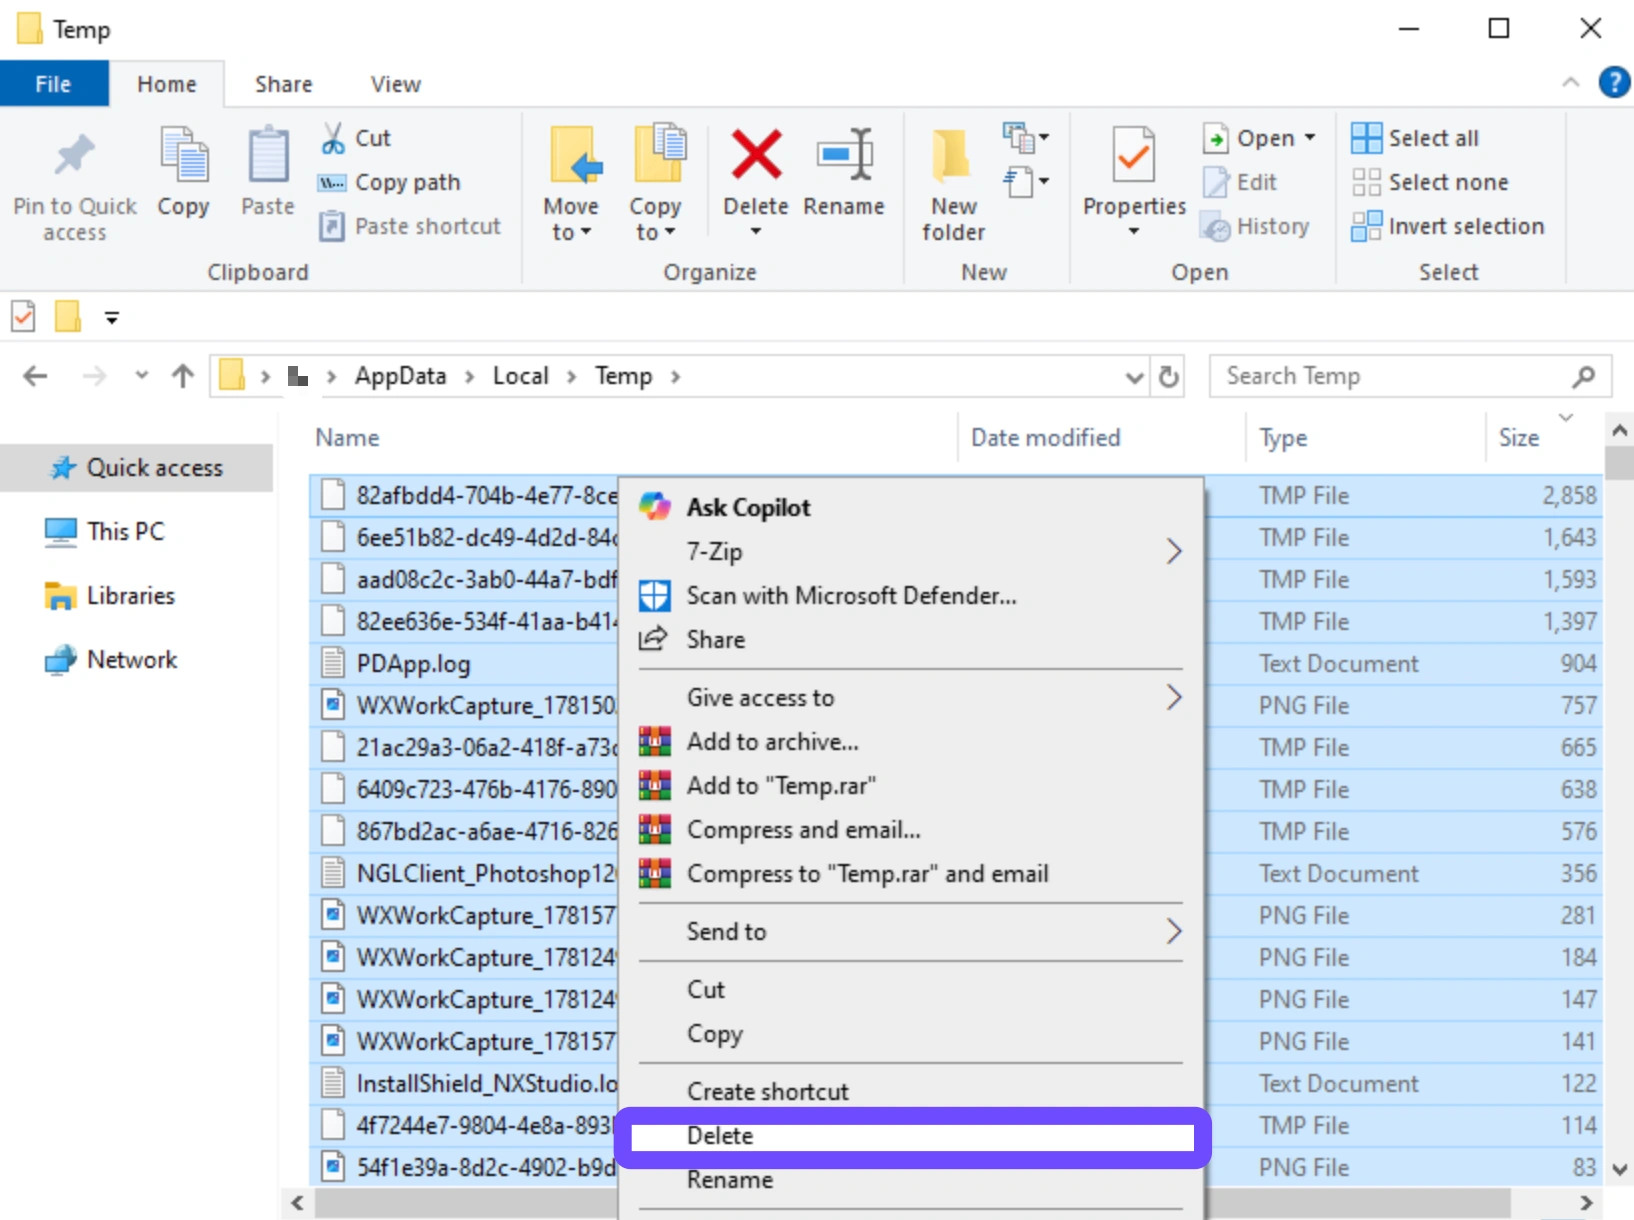
Step 2: Navigate to your local AppData directory and delete temporary game cache files.
Step 3: Ask the server administrator to temporarily move your player profile file out of the world save folder.
Step 4: Rejoin the server to generate a clean character file, then restore inventory items if needed.
Everyone Gets Disconnected From the Server
If all players suddenly drop and see a Dragonwilds network connection was interrupted message, the host system is dropping outbound traffic or crashing under load.
Step 1: Monitor CPU and RAM usage on the host system using Task Manager or system monitors.
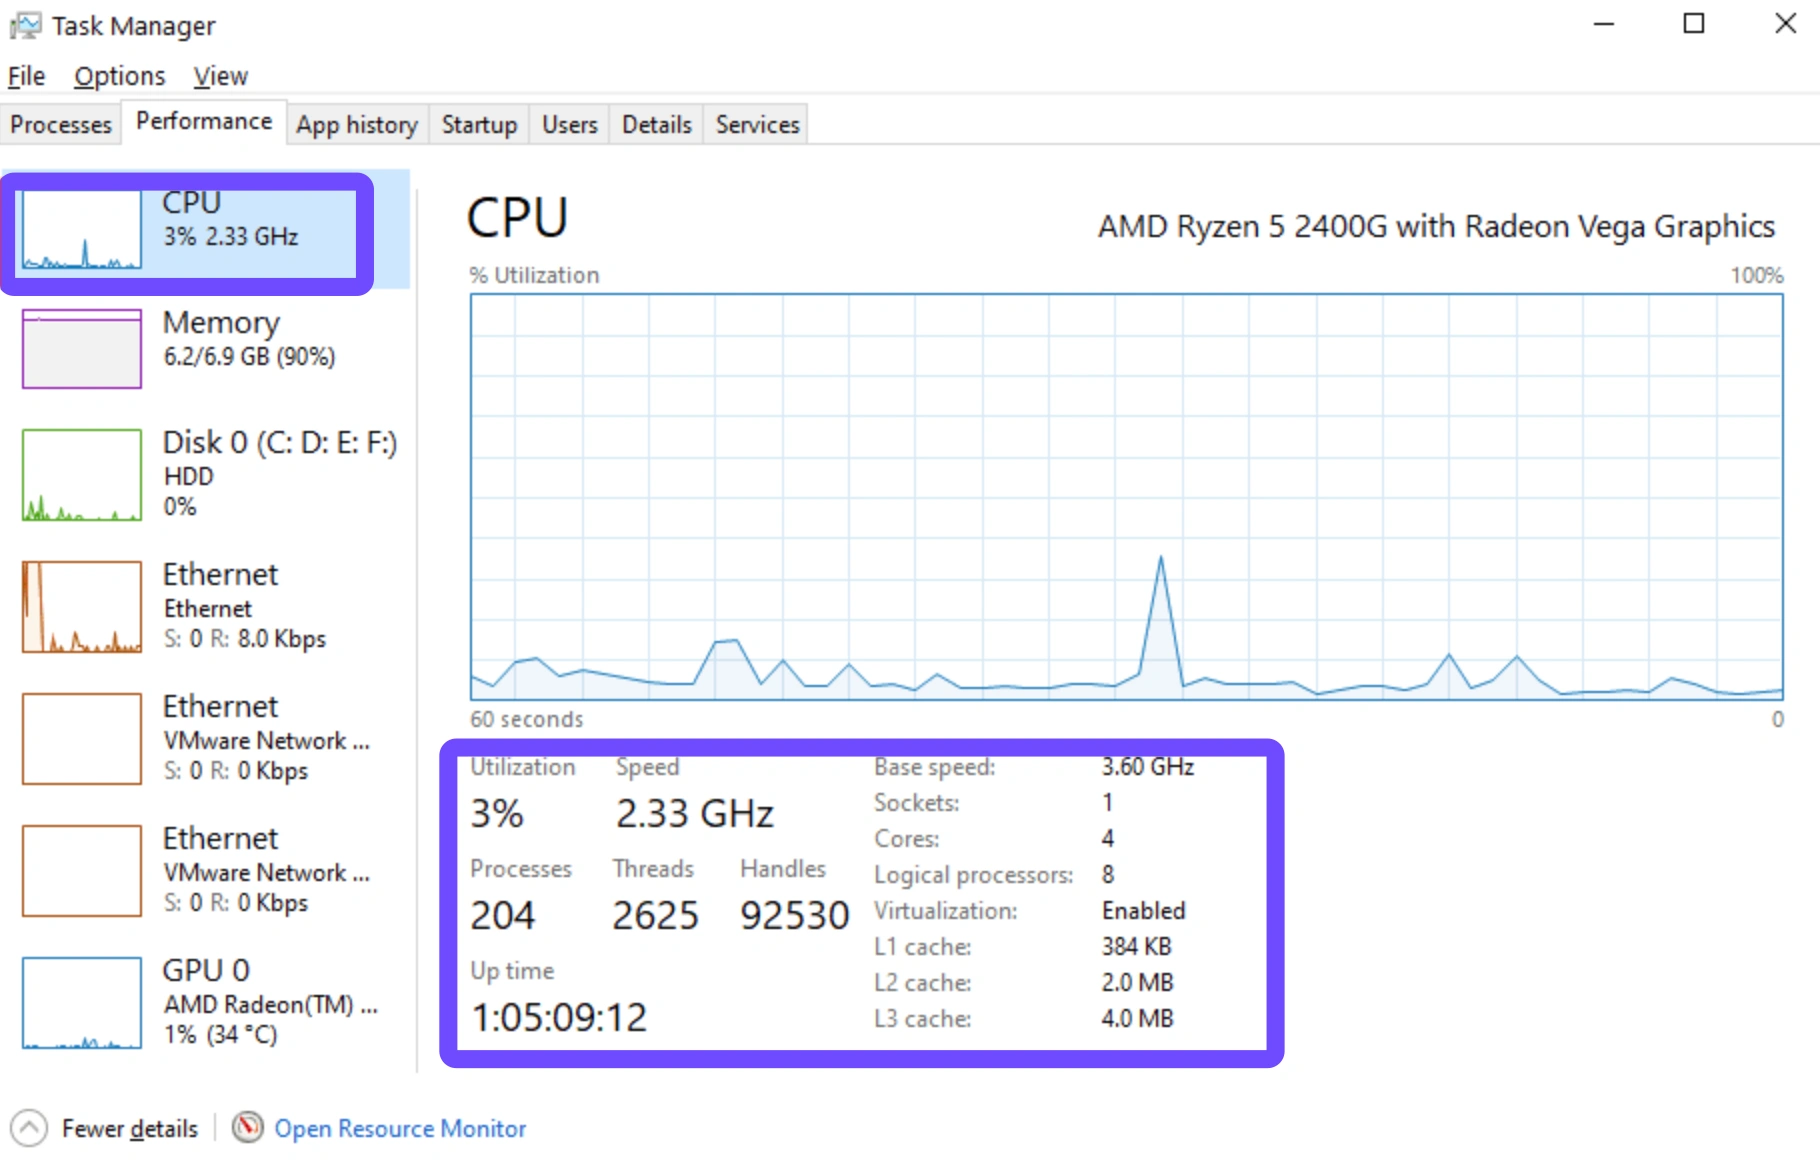
Step 2: Lower server tick rate or maximum player limits in the configuration settings to reduce memory pressure.
Step 3: Connect the host machine directly to the router using an Ethernet cable instead of Wi-Fi.
Step 4: Disable background applications or bandwidth-heavy downloads running on the host machine.
Dedicated Server Keeps Crashing
When a Dragonwilds dedicated server keeps crashing shortly after boot, it is usually caused by corrupted world chunks or invalid configuration parameters.
Step 1: Open the logs directory inside your server installation folder.
Step 2: Inspect the latest log file to find the last recorded exception or crash trigger.
Step 3: Revert recent changes made to config files or world save parameters.
Step 4: Restore a previous automatic world backup from before the crashes started occurring.
Dedicated Server Stops Working After an Update
When a Dragonwilds dedicated server is not working after update, the client has updated automatically via Steam, but the server files remain on an older build.
Step 1: Shut down the active server process entirely.
Step 2: Launch SteamCMD or your server management script.
Step 3: Execute the update command targeting the Dragonwilds dedicated server AppID.
Step 4: Verify that the server console displays a successful build update message before launching.
Direct Connect Shows a Network Connection Error
If your Dragonwilds friends can't join server sessions using Direct Connect, the network routing between host and client is failing.
Step 1: Confirm the host is giving players their external IPv4 address rather than a local IP like 192.168.x.x.
Step 2: Ensure the host is not running a active VPN that alters outbound port mapping.
Step 3: Have joining players flush their local DNS cache using Command Prompt.
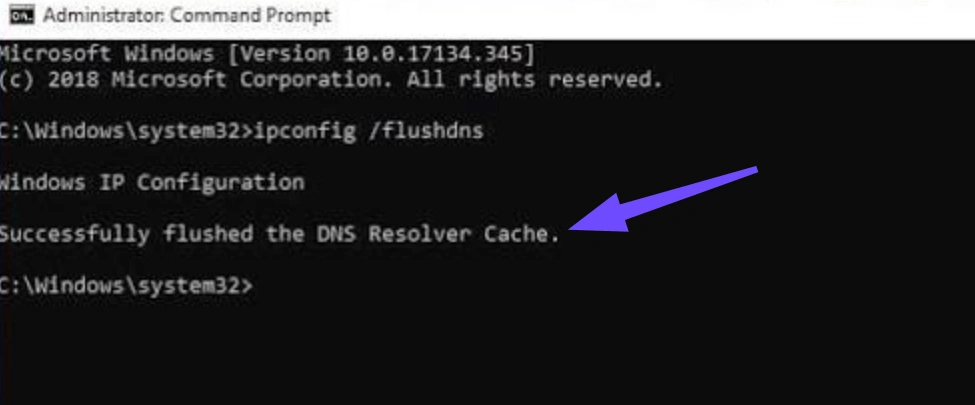
Step 4: Test host connectivity by pinging the host IP address directly through terminal commands.
Linux or Docker Dedicated Server Is Not Working
Running dedicated servers inside Linux or Docker environments requires specific permission sets and library dependencies.
Step 1: Check container logs to verify all required dependencies are installed inside the environment.
Step 2: Verify file permissions on the world save directory so the server process can write updates.
Step 3: Ensure environment variables for network ports match the container port mapping definitions.
Step 4: Increase container memory limits to prevent out-of-memory kernel terminations.
Part 4: How LagoFast Keeps Your Dragonwilds Dedicated Server Connection Stable
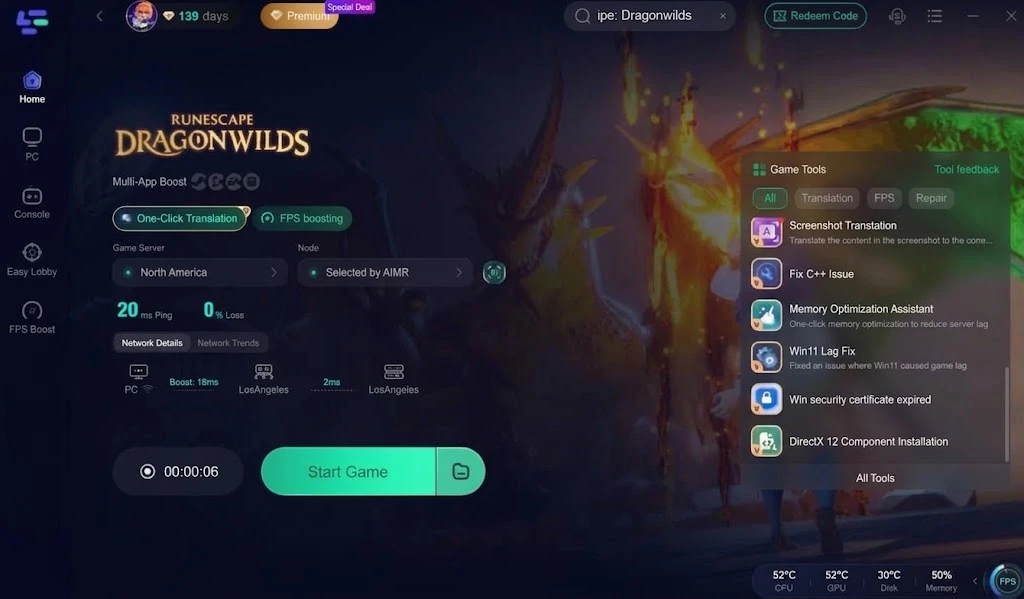
Once your server configuration is fixed, maintaining a low-latency connection for all connected players remains essential. LagoFast helps players eliminate routing hops, fix unstable ping, and prevent mid-game packet loss when connecting to private or remote servers. By routing traffic through optimized global nodes, LagoFast bypasses regional network congestion, prevents sudden disconnections, and ensures smooth multiplayer performance.
H3: How to Use LagoFast to Keep Your Dragonwilds Dedicated Server Connection Stable:
Step 1. Download and Install LagoFast.
Step 2. Open the LagoFast application, navigate to the search bar at the top, and type in RuneScape or your target game title.
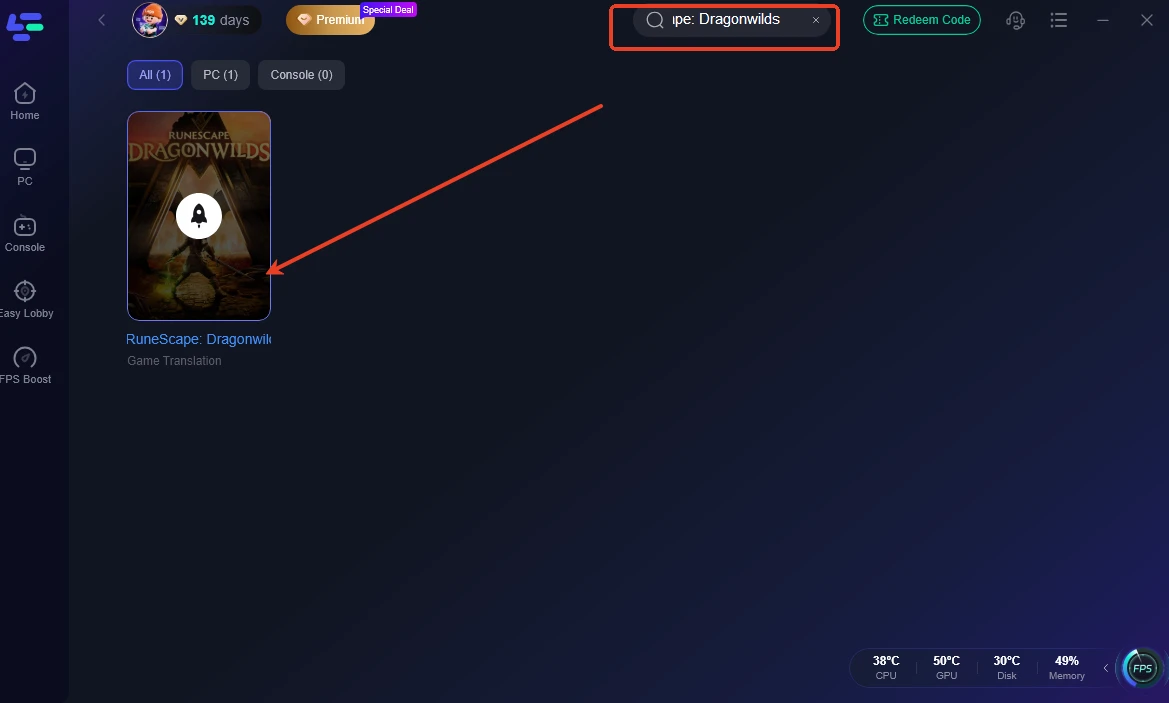
Step 3. Click on the game icon, then choose your target server region. You can pick a specific node manually or rely on Smart Boost to assign the lowest-latency route automatically.
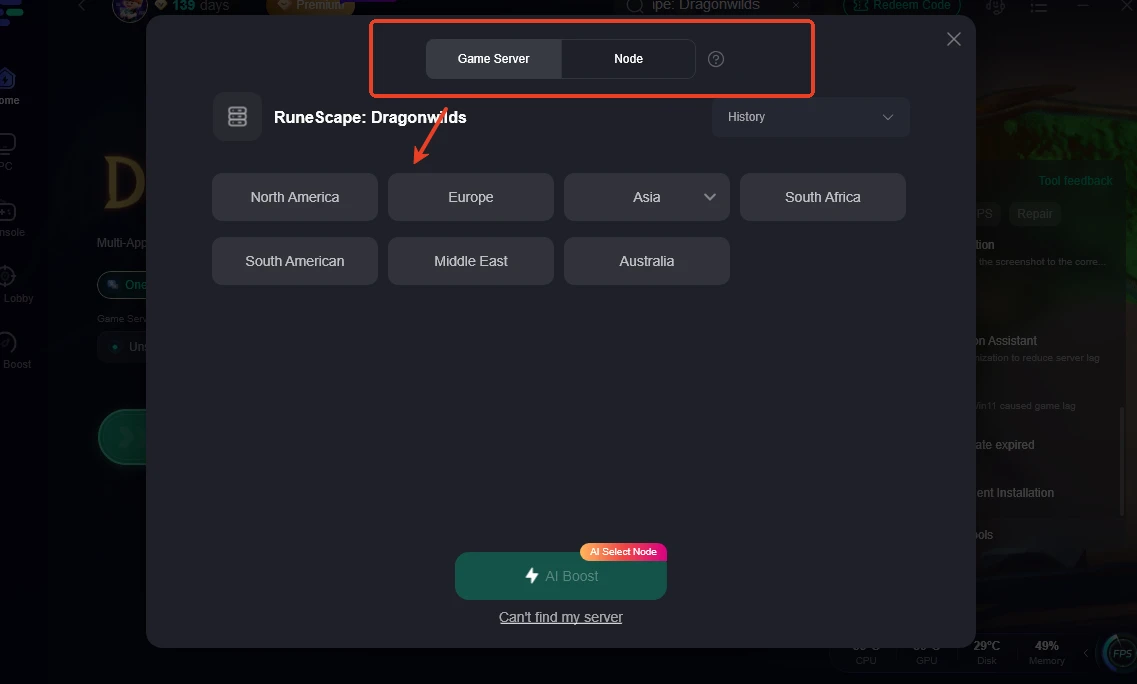
Step 4. Click the Boost button. Once real-time ping optimization displays on screen, launch the game directly to join or host your dedicated server.
Part 5: How to Protect Your World Save Before Reinstalling or Resetting the Server
When troubleshooting persistent server issues, reinstalling server software may become necessary. Protecting your world progress requires backing up key save directories before taking action.
Follow these steps to secure your save files before performing a clean server installation.
Step 1: Stop the server process completely to ensure save files are not locked by active operations.
Step 2: Navigate to your server root directory and locate the Saves or Saved Games folder.
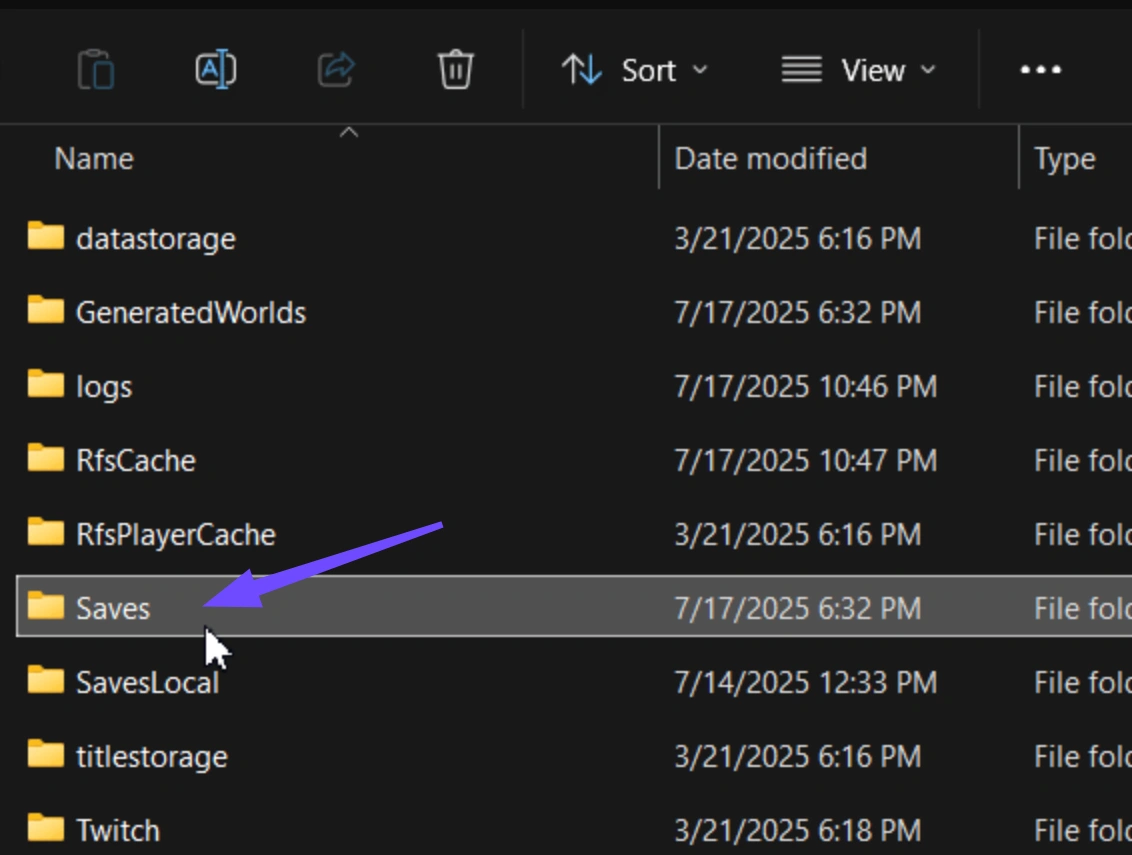
Step 3: Copy the entire world save folder to a safe location outside the game directories, such as your Desktop.
Step 4: Locate configuration files such as ServerSettings.ini or Config.json and copy them to your backup location.
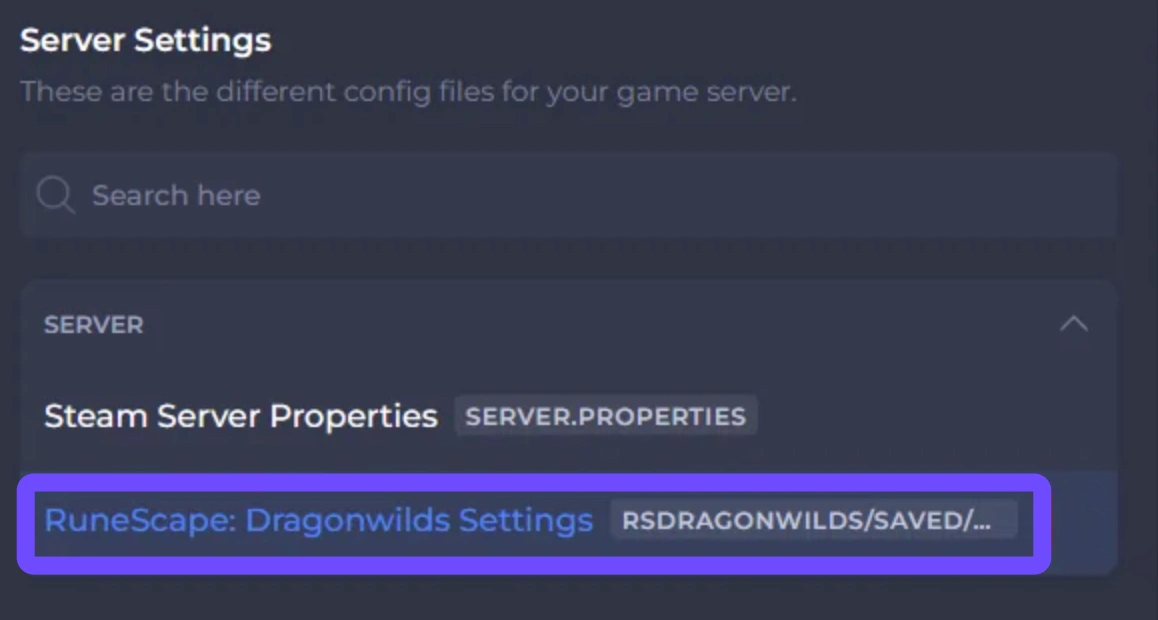
Step 5: Proceed with server reinstallation or verification steps.
Step 6: Copy your backed-up world save folder back into the fresh installation directory before starting the server.
Part 6: RuneScape Dragonwilds Dedicated Server FAQs
Here are answers to common questions about hosting and troubleshooting dedicated servers.
Why is my Dragonwilds server not showing in server list?
This occurs when query ports are blocked by a firewall or the server configuration file has public listing turned off.
What ports do I need to open for a Dragonwilds dedicated server?
You must open the main game port and query ports defined in your server settings through both UDP and TCP protocols.
How do I fix the Dragonwilds dedicated server black screen error?
Delete client cache files or remove stuck character profiles from the server world save folder to fix loading hangs.
Why are my friends unable to join my server via IP?
Ensure port forwarding is configured correctly on your router and that you provide your public IP address rather than a local machine IP.
What causes the Dragonwilds network connection was interrupted message?
This error is triggered by sudden packet loss, host memory overload, or unstable router connections between host and client.
How do I update my dedicated server without losing world progress?
Run the update command via SteamCMD directly over your existing installation. Your save files stored in separate subfolders will remain intact.
Conclusion
Resolving dedicated server problems comes down to verifying software updates, matching network configurations, and ensuring firewall ports remain open. By using the systematic steps outlined in this guide, you can eliminate startup crashes, fix black screens, and get your multiplayer world running smoothly again. Keep your server files backed up regularly and use tools like LagoFast to maintain fast, low-latency connections for everyone on your server.

Boost Your Game with LagoFast for Epic Speed
Play harder, faster. LagoFast game booster eliminates stutter and lags on PC, mobile, or Mac—win every match!
Quickly Reduce Game Lag and Ping!
Boost FPS for Smoother Gameplay!