Call of Duty: Black Ops 7 introduces strict system security requirements for PC players: Secure Boot must be enabled alongside TPM 2.0. These settings, found in your BIOS/UEFI firmware, are essential to launch the game. If either Secure Boot or TPM 2.0 is disabled, you may encounter startup errors or be prevented from playing entirely. This guide explains what Secure Boot is, how it affects gaming, how to check its status, and step-by-step instructions to enable it—ensuring a smooth Black Ops 7 experience.

- ✅ Reduce Lag and Boost FPS
- ✅ Ensure Stable Server Connection.
- ✅ Change Server without Latency.
- ✅ Fix Crashing and Stuck Errors.
- ✅ 0% Packet Loss Rate
- ✅ Boost Game Downloading Speed.
Part 1: What Is Secure Boot and How Does It Affect Games?
Part 2: How to Check Secure Boot & TPM Status on PC
Part 3: How to Enable Secure Boot & TPM 2.0 for Call of Duty: Black Ops 7
Part 4: How to Optimize Your Call of Duty: Black Ops 7 Gaming Experience
Part 5: FAQs about Secure Boot
Part 1: What Is Secure Boot and How Does It Affect Games?
Secure Boot is a security feature built into modern Windows PCs that ensures only trusted, digitally signed software can load when your system starts. It prevents unauthorized bootloaders, rootkits, or malicious drivers from interfering with your operating system.
For gaming, Secure Boot has become increasingly important because many anti-cheat systems operate at the kernel level of Windows. By enforcing Secure Boot, developers like Activision ensure that players cannot bypass security mechanisms with hidden software.
Here’s how Secure Boot affects games like Call of Duty: Black Ops 7:
- Anti-cheat enforcement: Prevents unauthorized kernel-level tools or cheats from running.
- Stability: Reduces risk of system crashes caused by unsigned drivers.
- Compatibility with TPM 2.0: Provides an added layer of hardware-based security for Windows 11 and competitive gaming.
- No performance impact: Secure Boot only runs during system startup. It does not affect FPS, loading times, or gameplay performance.
In short, enabling Secure Boot is not about making your PC faster—it’s about creating a trusted environment where anti-cheat tools can function properly. Without it, Black Ops 7 may refuse to launch.
How do I turn on Secure Boot for Black Ops 7?
Step 1: Check If Secure Boot Is Enabled
- Press Win + R, type
msinfo32, and press Enter. - Look for Secure Boot State:
- If it says On, you’re done.
- If it says Off or Unsupported, continue.
Step 2: Enter BIOS/UEFI Settings
- Restart your PC.
- While booting, press the BIOS key (commonly Del, F2, F10, or Esc depending on your motherboard).
- You’ll enter the BIOS/UEFI menu.
Step 3: Enable UEFI Mode (Required for Secure Boot)
- In BIOS, find Boot Mode or UEFI/Legacy Boot option.
- Change it to UEFI (not Legacy/CSM).
- If it’s currently Legacy, you may need to reinstall Windows in UEFI mode for Secure Boot to work.
Step 4: Turn On Secure Boot
- In BIOS, find the Secure Boot setting (usually under “Boot” or “Security”).
- Set Secure Boot to Enabled.
- Save and exit (usually F10).
Step 5: Verify Again
- After reboot, run
msinfo32again → check Secure Boot State = On. - Now Black Ops 7 should pass the Secure Boot requirement.
Warning: If your Windows was installed in Legacy BIOS mode, simply turning on Secure Boot won’t work. You’d need to convert your system disk from MBR → GPT and reinstall Windows in UEFI mode.
How do I update my BIOS for Black Ops 7
Step 1: Find Your Motherboard Info
- Press Win + R, type
msinfo32, press Enter. - Note these values:
- BaseBoard Manufacturer (ASUS, MSI, Gigabyte, ASRock, etc.)
- BaseBoard Product (exact model, e.g., B550 Tomahawk).
- BIOS Version/Date (to see if you’re outdated).
Step 2: Download the Right BIOS Update
1. Go to your motherboard brand’s official support site (never 3rd party).
- ASUS: asus.com/support
- MSI: msi.com/support
- Gigabyte: gigabyte.com/Support
- ASRock: asrock.com/support
2. Enter your exact motherboard model.
3. Go to BIOS / Firmware section.
4. Download the latest stable BIOS (avoid “beta” unless specifically fixing TPM/Secure Boot issues).
Step 3: Prepare the Update
- Format a USB drive to FAT32.
- Copy the downloaded .CAP / .ROM / .BIN BIOS file onto it.
- Keep your PC plugged into reliable power (no interruptions).
Step 4: Flash the BIOS
1. Restart PC, enter BIOS (usually Del, F2, or F10 at boot).
2. Open the flashing tool (names differ):
- ASUS → EZ Flash
- MSI → M-Flash
- Gigabyte → Q-Flash
- ASRock → Instant Flash
3. Select your BIOS file from the USB.
4. Confirm → start update → do not power off until done.
Step 5: Enable Secure Boot + TPM
After flashing, BIOS resets to defaults. Re-enable required settings:
- Boot Mode: UEFI (not Legacy/CSM).
- Secure Boot: Enabled.
- TPM:
- AMD → fTPM
- Intel → PTT
Save changes → reboot.
Now check in Windows:
- Run
msinfo32→ Secure Boot State = On. - Run PowerShell
Get-Tpm→ should show Present + Ready + Enabled.
Part 2: How to Check Secure Boot & TPM Status on PC
Before enabling Secure Boot and TPM 2.0, you should check if your PC already supports them. You can do this in two ways:
Option 1: Use Secure Boot Check Tool of LagoFast
LagoFast is more than just a ping reducer—it comes with a built-in Secure Boot & TPM 2.0 check tool. Instead of digging into your BIOS or running complex commands, LagoFast automatically checks the current Secure Boot status and follows a step-by-step guide to enable it.
Tool Features:
- Game Boost Auto Scan: Automatically checks your system and game performance, alerting you to any issues.
- One-Click MBR ➡ GPT Conversion: Quickly convert disk partition format from MBR to GPT.
- One-Click BIOS Restart & Mobile Tutorial: Restart directly into BIOS with one click, plus step-by-step mobile tutorials. If a BIOS issue is detected, the tool guides you to the relevant tutorial.
Step 1: Click the Free Trial button to download and install LagoFast.
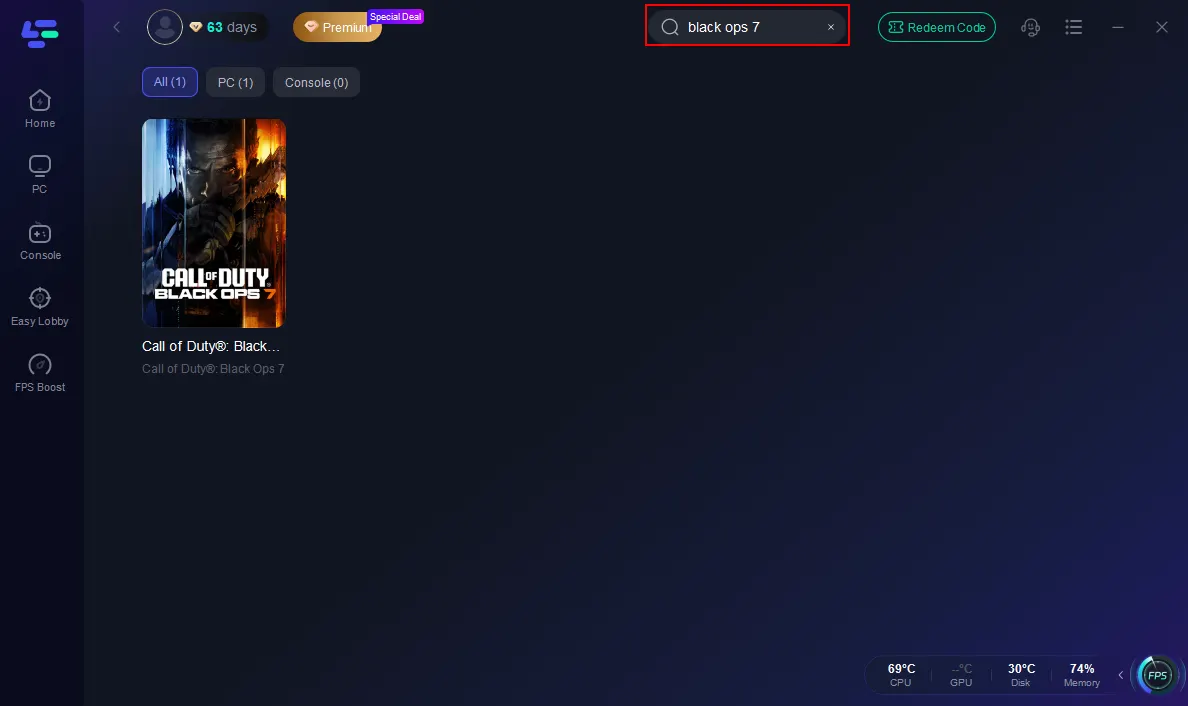
Step 2: Search Black Ops 7 in the search bar, and click it after it appears.
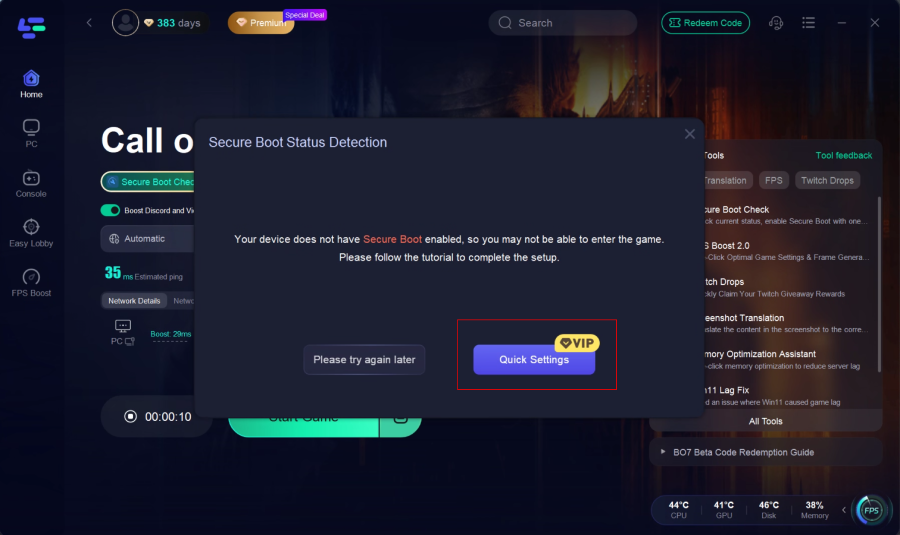
Step 3: Run the Secure Boot check tool.
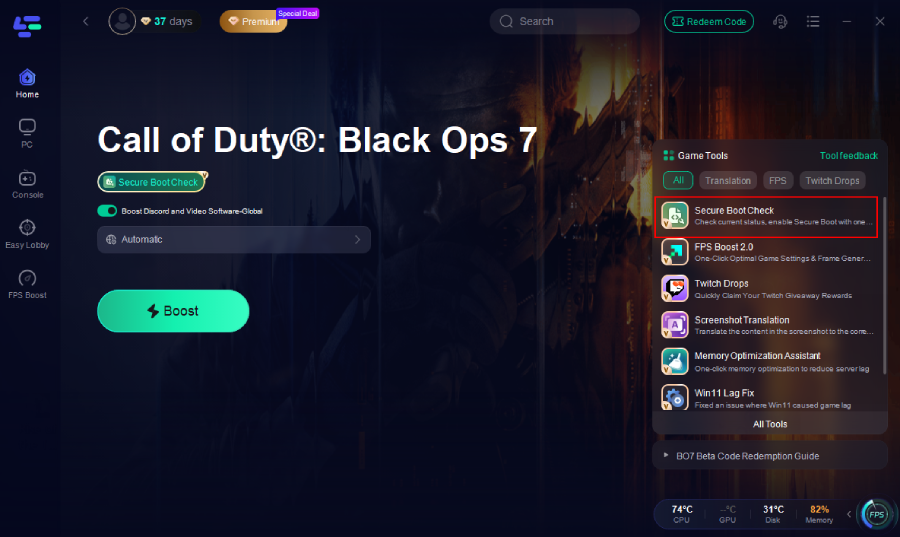
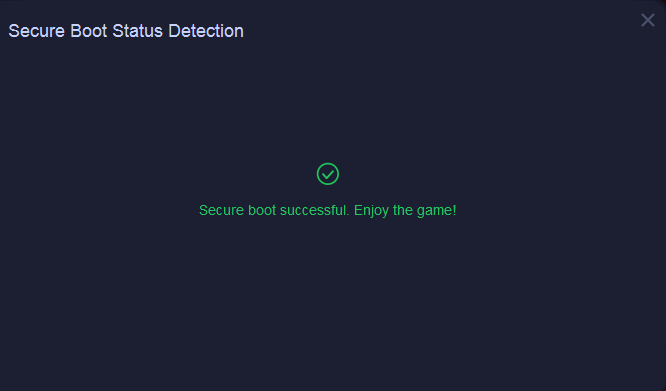
If Secure Boot is already enabled on your PC, the tool will display "Successful".
If not, it will notify you and provide a tutorial. Click “Quick Settings” to proceed.
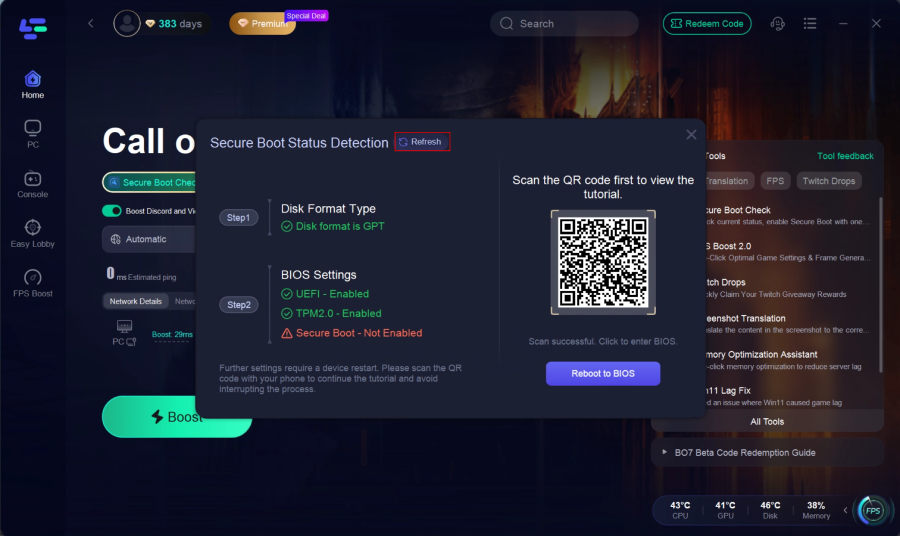
Step 4: BIOS Settings (Secure Boot)
- Check BIOS settings: the tool will display the current status of UEFI, TPM 2.0, and Secure Boot.
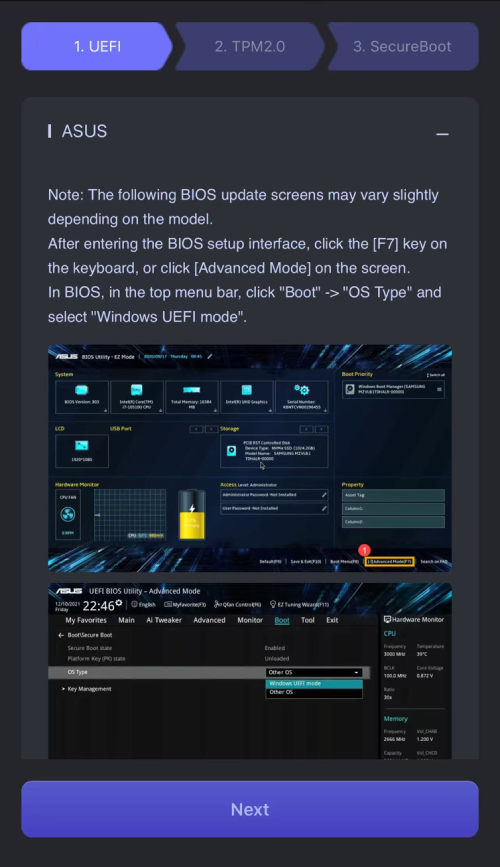
- If Secure Boot is not enabled, scan the QR code to view the model-specific tutorial, then click Reboot to BIOS and follow the instructions to enable it.
- After finishing, return to the tool and click Refresh to recheck the status.
This is the fastest option for gamers who don’t want to risk BIOS misconfigurations.
Option 2: Manual Check
If you prefer checking manually, follow these steps:
Step 1: Check Secure Boot Status
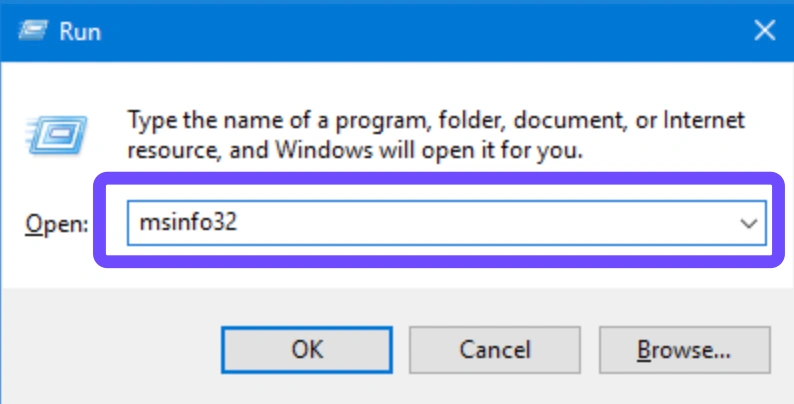
- Press Windows + R, type msinfo32, and hit Enter.
- In the System Information window, look for “BIOS Mode” and “Secure Boot State.”
- If BIOS Mode = UEFI and Secure Boot State = On, you’re good.
- If it says Legacy or Off, Secure Boot is not enabled.
Step 2: Check TPM Version
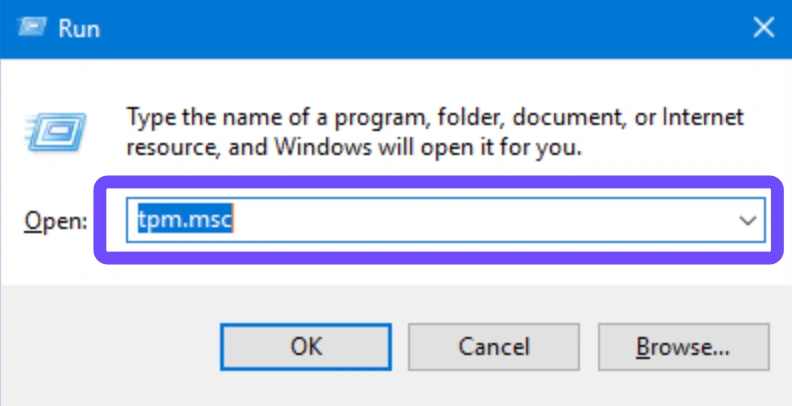
- Press Windows + R, type tpm.msc, and press Enter.
- In the TPM Management window, check Specification Version.
- It must show 2.0 for compatibility.
- If it shows “The TPM is ready for use,” then TPM 2.0 is enabled.
- If TPM is not found, it may be disabled in the BIOS.
Step 3: Check Partition Style (MBR vs GPT)
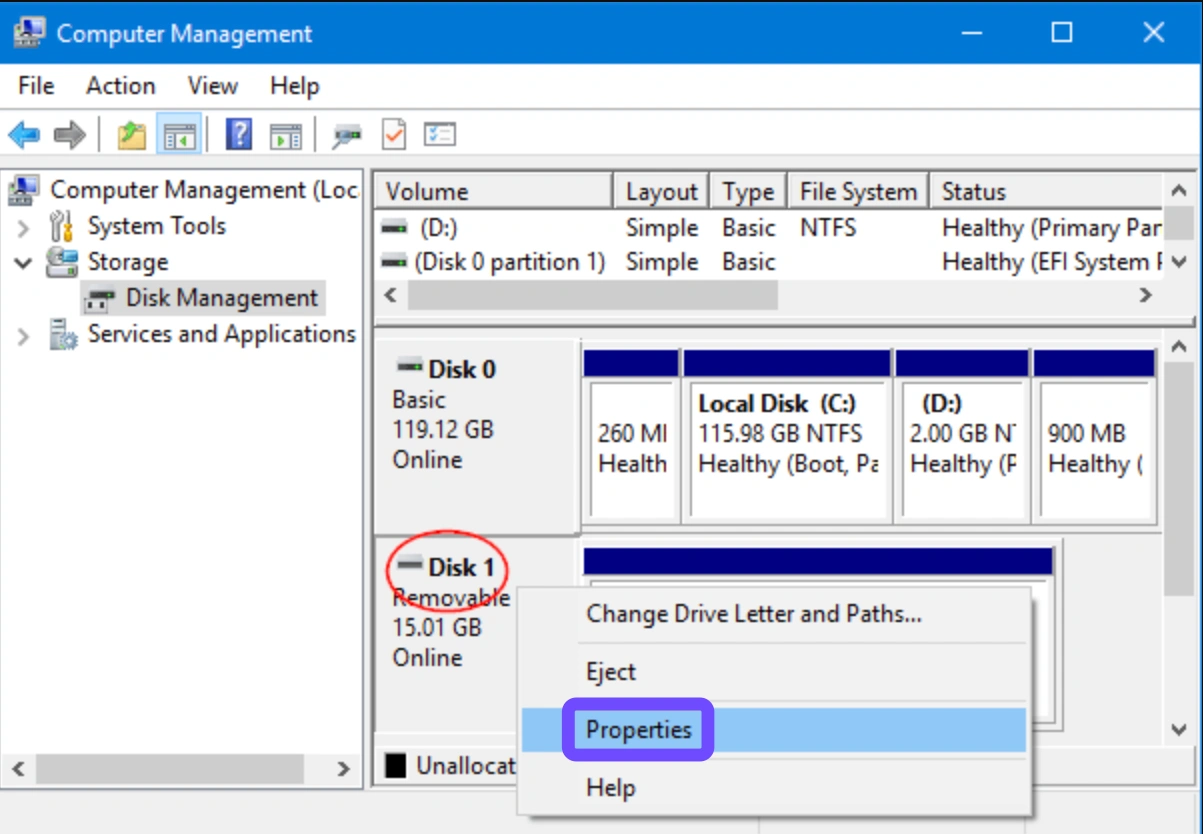
- Right-click the Start menu and select Disk Management.
- Right-click your primary disk (C:) → Properties.
- Under Volumes, check “Partition Style.”
- If it shows GPT, Secure Boot can be enabled.
- If it shows MBR, you must convert it to GPT.
Step 4: Convert MBR to GPT (if needed)
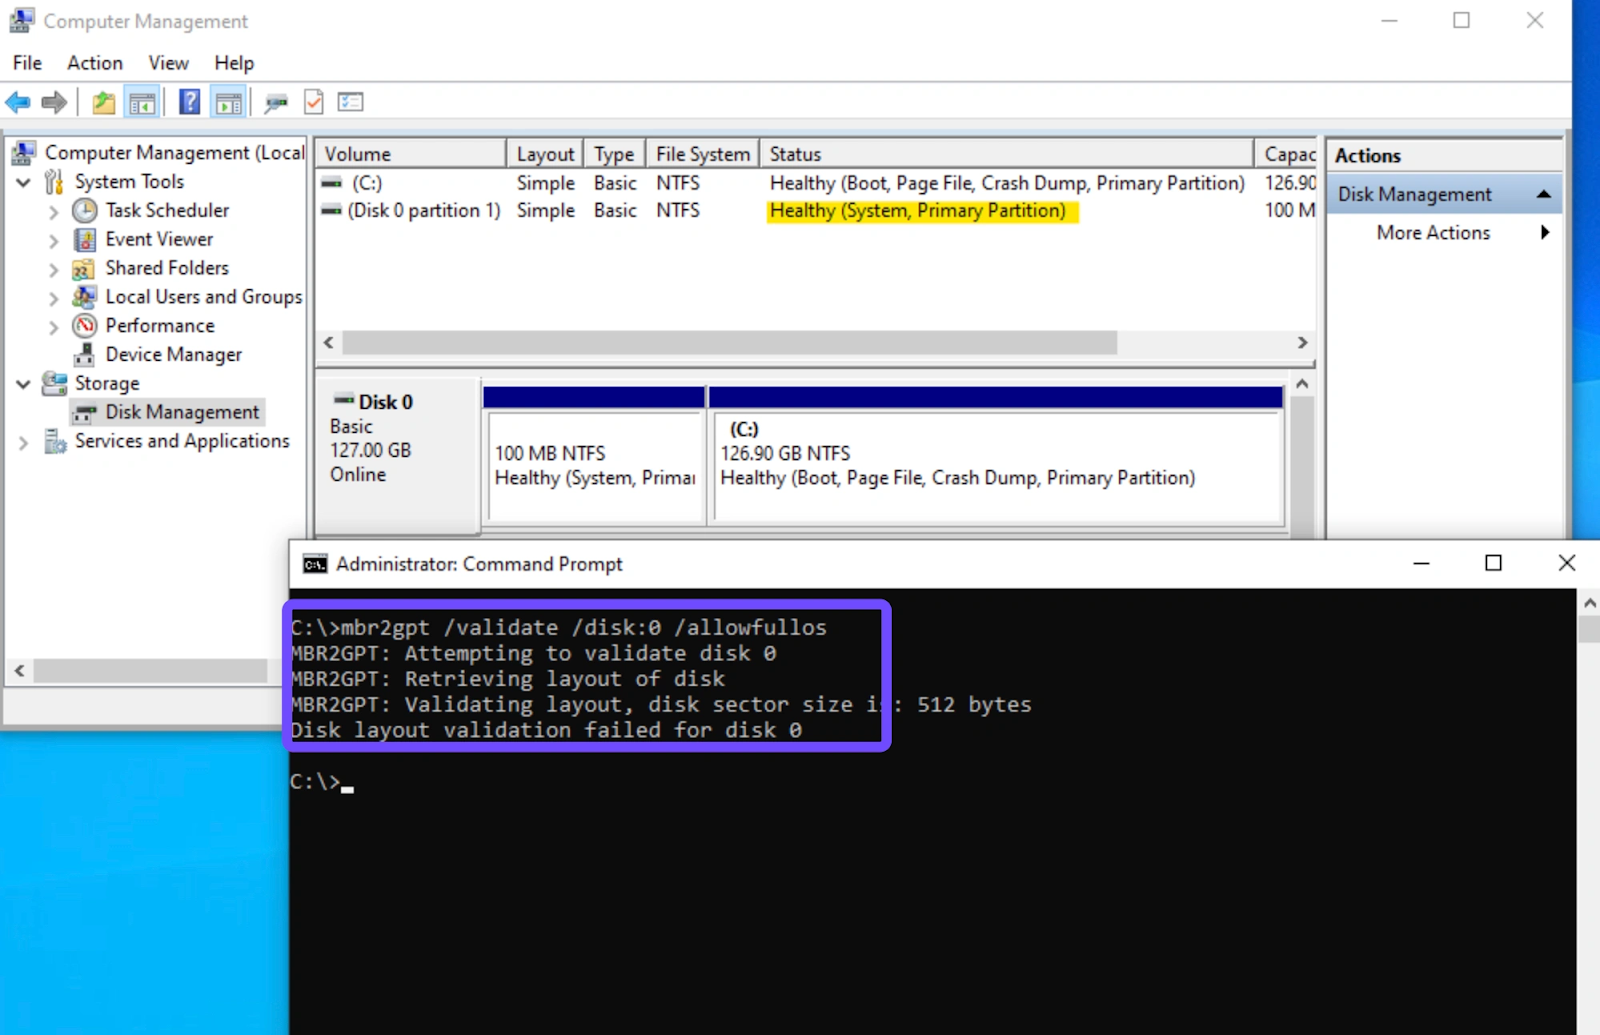
- Open Command Prompt as Administrator.
- Run: mbr2gpt /validate /disk:0 /allowFullOS
- If validation passes, run: mbr2gpt /convert /disk:0 /allowFullOS
- Restart your PC.
- Verify your disk is now GPT.
Step 5: Confirm BIOS is UEFI
- Restart your PC and enter BIOS (usually F2, F10, or Delete at boot).
- Ensure Boot Mode = UEFI (not Legacy/CSM).
- Save changes and reboot.
- At this point, your PC is ready to enable Secure Boot and TPM 2.0.
Part 3: How to Enable Secure Boot & TPM 2.0 for Call of Duty: Black Ops 7
Now that you’ve confirmed compatibility, here’s how to enable them:
Step 1: Enter BIOS/UEFI
- Restart your PC.
- During startup, press the key to enter BIOS (often F2, Del, or Esc depending on brand).
- Look for “UEFI Firmware Settings.”
Step 2: Enable TPM 2.0
- In BIOS, navigate to Security → Trusted Computing.
- Look for TPM, fTPM (AMD), or PTT (Intel).
- Set it to Enabled.
- Save and reboot.
Step 3: Enable Secure Boot
- Go back into BIOS.
- Navigate to Boot → Secure Boot.
- Set it to Enabled.
- If greyed out, reset Secure Boot keys to factory defaults.
- Save and reboot.
Step 4: Check Secure Boot Mode
- If prompted, select Standard Mode (not Custom).
- Save changes and exit.
Step 5: Launch Black Ops 7
Once your system restarts, launch Call of Duty: Black Ops 7. If everything is enabled correctly, the Secure Boot error should disappear.
Part 4: How to Optimize Your Call of Duty: Black Ops 7 Gaming Experience
Enabling Secure Boot and TPM 2.0 solves the compatibility issue—but what about performance? This is where LagoFast comes in. LagoFast isn’t just a Secure Boot checker. It also optimizes your Black Ops 7 experience with:
- Lower ping & reduced lag: Stable connections to COD servers.
- FPS boost mode: Optimizes background processes for smoother gameplay.
- Easy Lobby feature: Helps match with lower-skill lobbies for relaxed play.
- Auto Secure Boot check: Ensures your system is configured correctly for BO7.
By combining system security with performance optimization, LagoFast ensures you’re ready for both competitive and casual matches.
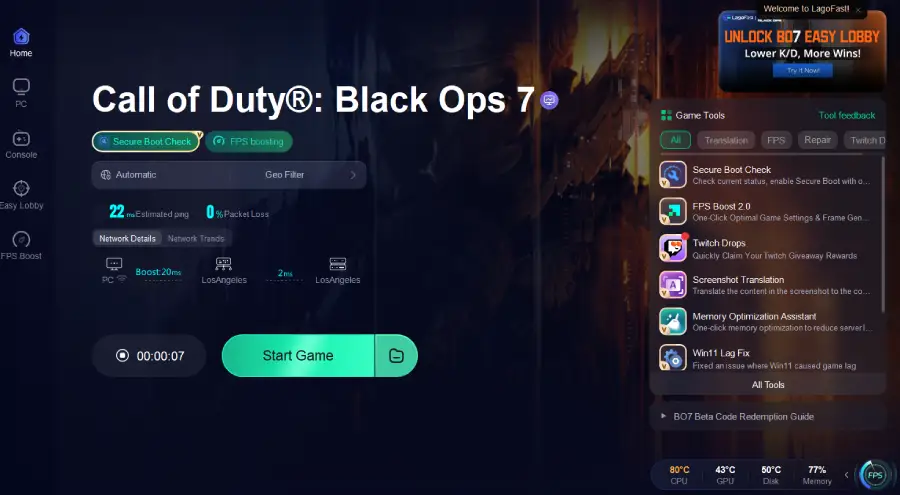
Tutorial to use LagoFast to optimize your gaming experience on PC:
Step 1: Open LagoFast, then click the PC button on the left and search Black Ops 7 in the search bar, and click it after it appears.
Step 2: Click on “Server” to change to a better server that ensures the Black Ops 7 gaming experience, then click on “Smart Boost”.
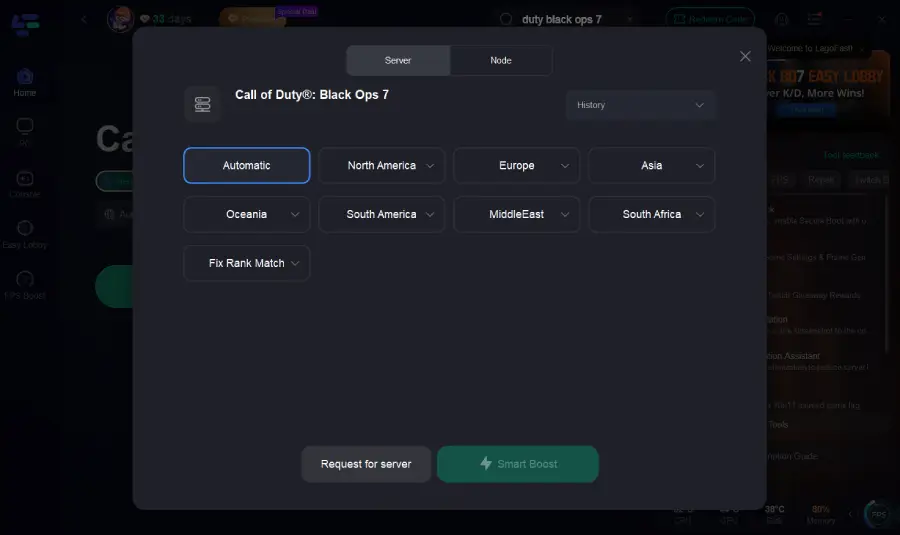
Step 3: Launch game and enjoy an enhanced gaming experience with reduced lag and improved stability.
How to Get Bot Lobbies in Black Ops 7
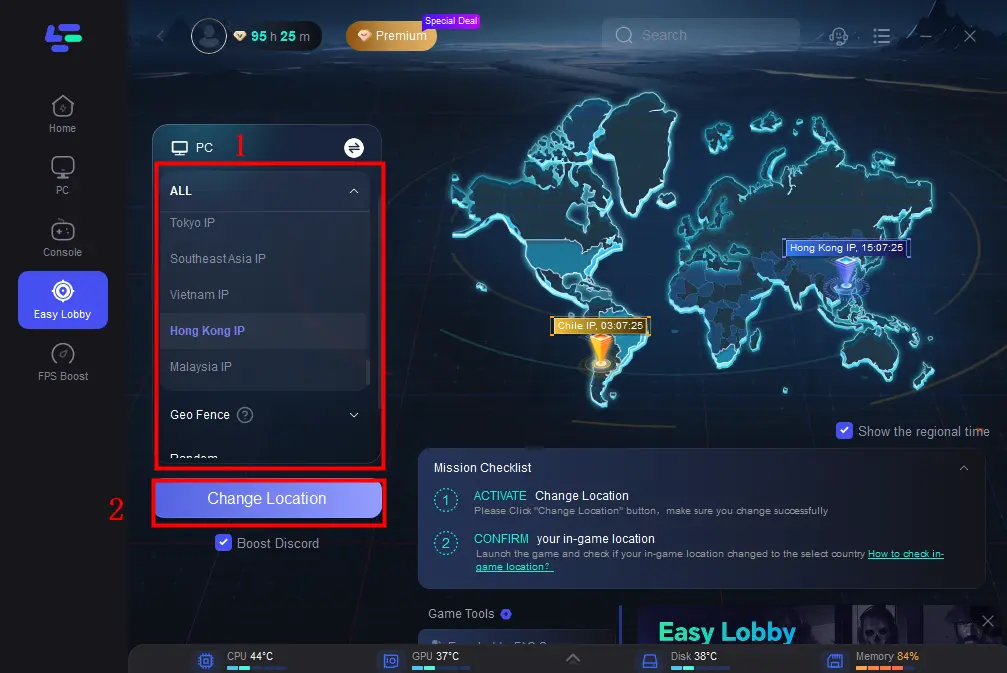
Step 1: Choose the "Easy Lobby" feature on the left.
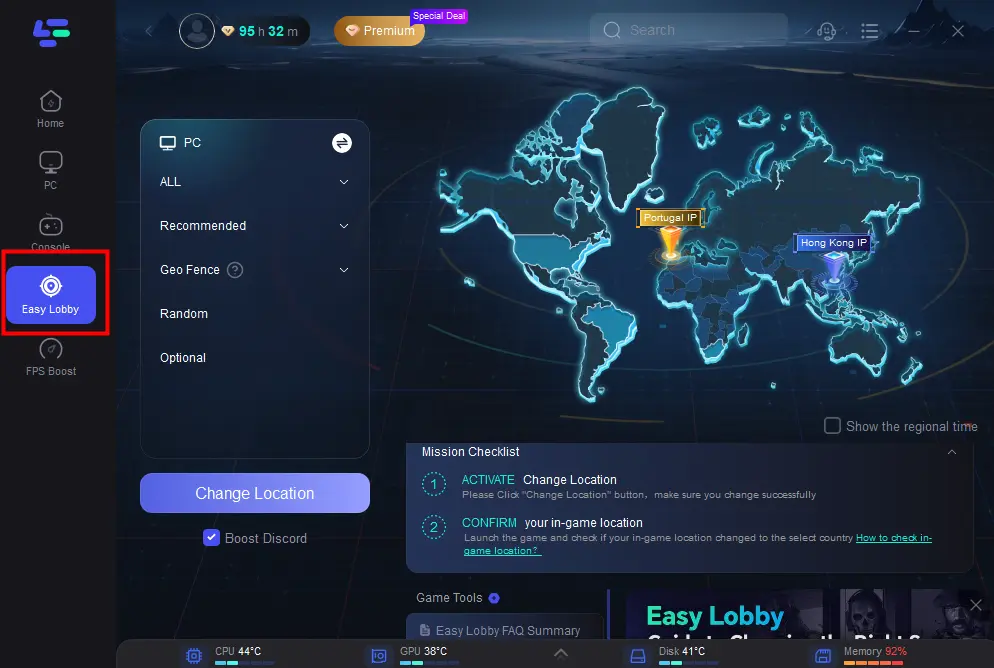
Step 2: Choose the server you like to match, like India IP > Click on the Change Location button to begin.
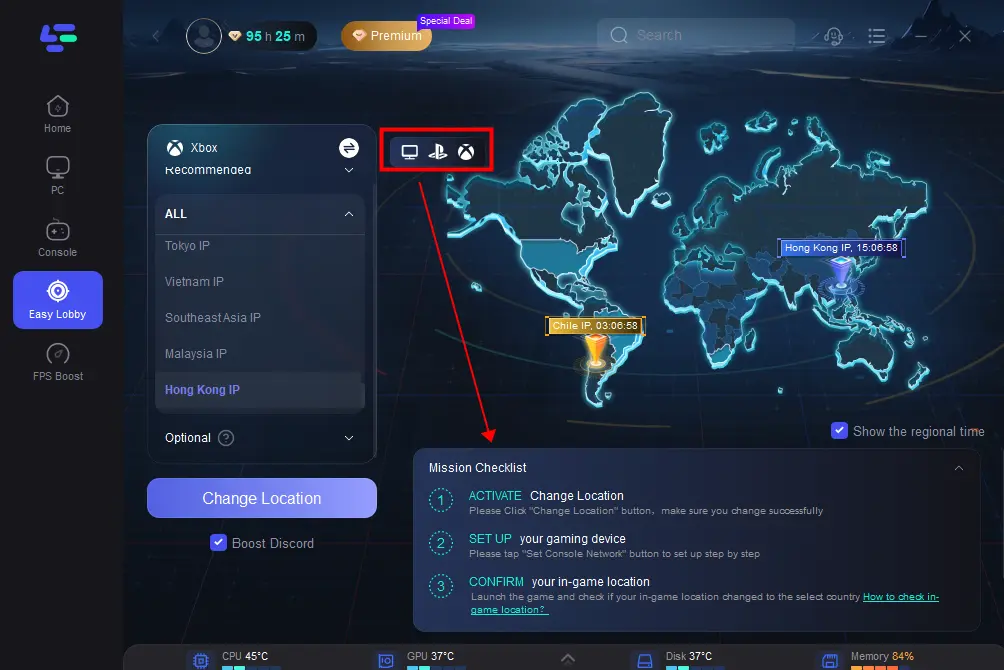
Step 3: You can also choose to upgrade to PS or Xbox, which gives you access to different features.
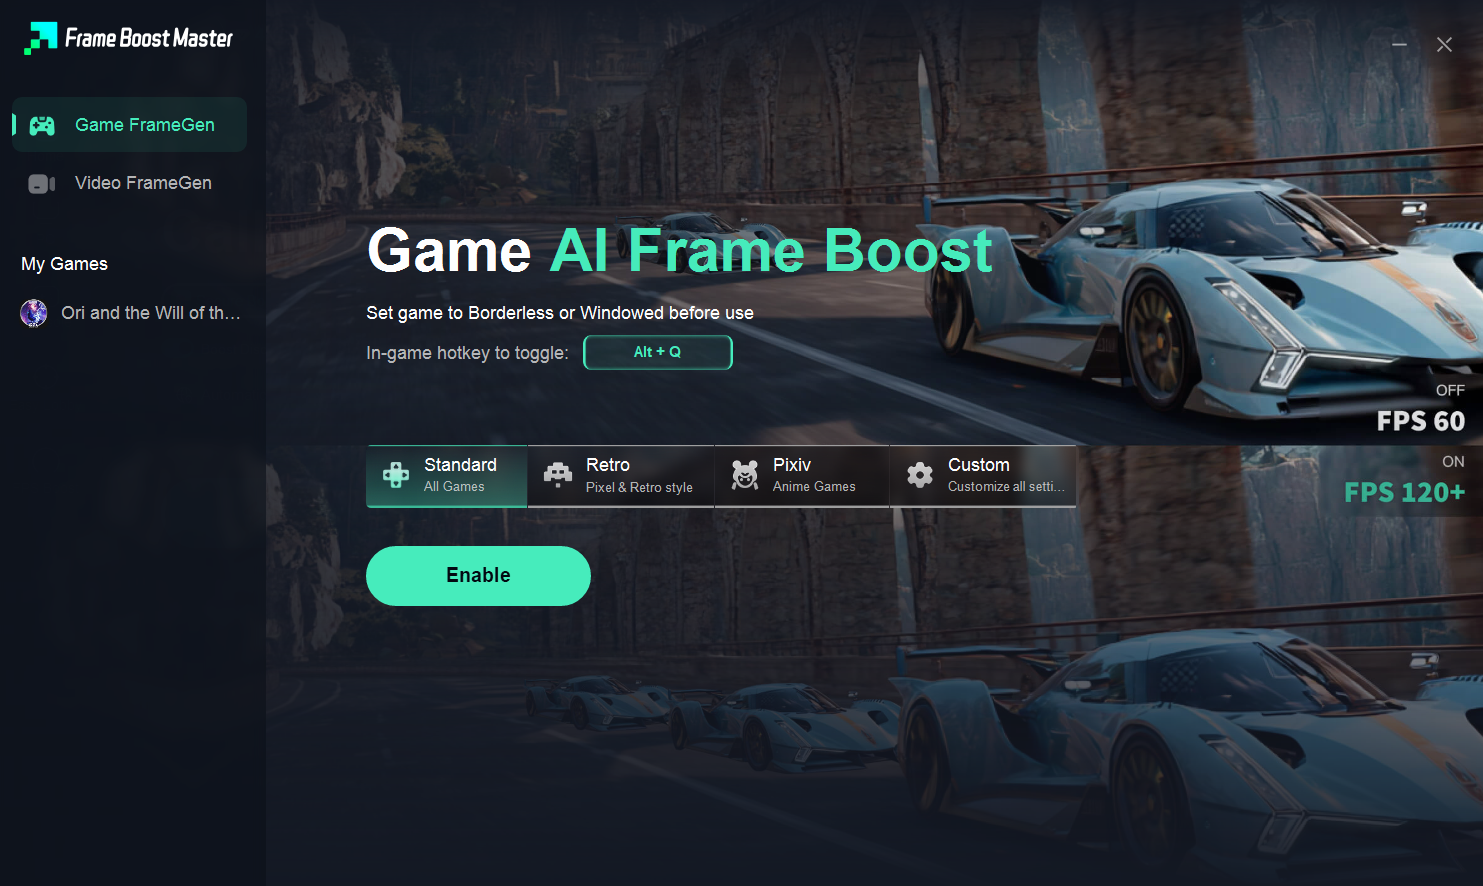
FPS Booster Tool: One-Click Optimal Game Settings & Frame Generation
Step 1. Click the FPS Boost 2.0 Tool on the right.
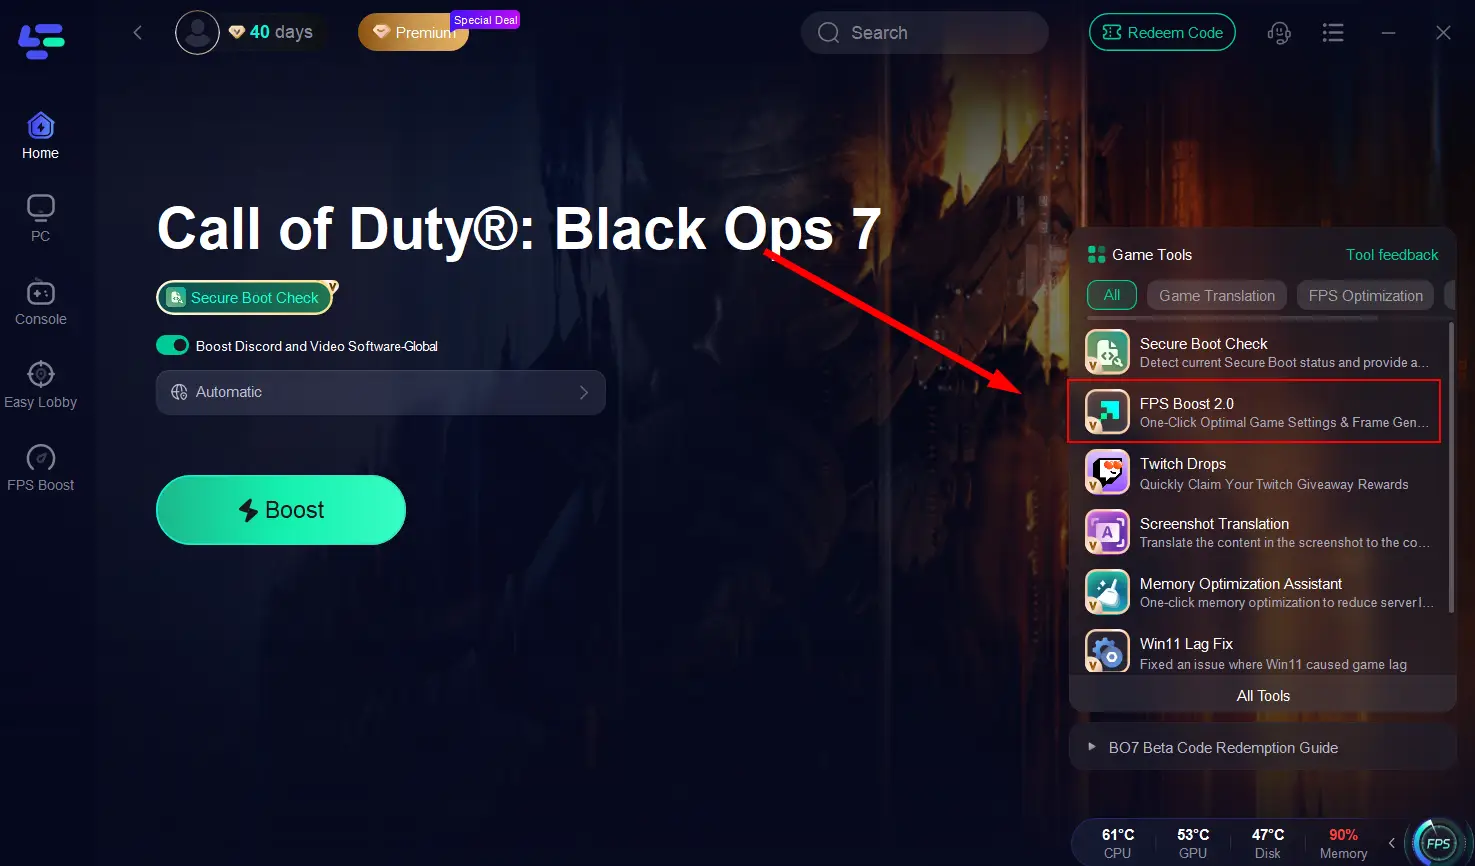
Step 2. You can speed up games or local video/browser. Set a hotkey and click Enable.
Part 5: FAQs about Secure Boot
Is Secure Boot required for Call of Duty: Black Ops 7?
Yes. Both Secure Boot and TPM 2.0 must be enabled to launch the game.
Does Secure Boot reduce FPS or affect gameplay?
No. It only verifies boot processes at startup. Your in-game performance remains the same.
Can I play without enabling Secure Boot?
No. Black Ops 7 will refuse to launch unless both Secure Boot and TPM 2.0 are enabled.
My BIOS doesn’t have Secure Boot—what can I do?
Older PCs may not support Secure Boot. In that case, upgrading your motherboard or CPU may be necessary.
Why is TPM 2.0 also required?
TPM 2.0 provides hardware-level cryptographic security, which enhances anti-cheat reliability and is mandatory for Windows 11.
Can enabling Secure Boot affect Linux or dual-boot setups?
Yes, some Linux distributions require additional configuration for Secure Boot. For gaming-only Windows PCs, there’s no issue.
Conclusion
With Secure Boot and TPM 2.0 enabled, you’ll meet Call of Duty: Black Ops 7’s strict security requirements and avoid frustrating launch errors. While these settings may seem intimidating at first, tools like LagoFast’s Secure Boot Check Tool make the process much easier. Once configured, you can focus on what really matters: dominating the battlefield. And with LagoFast boosting your ping, FPS, and connection stability, you’ll be fully prepared for every match.

Boost Your Game with LagoFast for Epic Speed
Play harder, faster. LagoFast game booster eliminates stutter and lags on PC, mobile, or Mac—win every match!
Quickly Reduce Game Lag and Ping!
Boost FPS for Smoother Gameplay!